Hey PSDFANS!
In today’s tutorial you’ll be brushing up on your photo manipulation skills, by creating a mystical tribal warrior. This tutorial is packed full of useful techniques, from blending tactics, to digital painting, lighting, layout sketching and much more.
We hope you love the final outcome, and get a lot from today’s lesson.
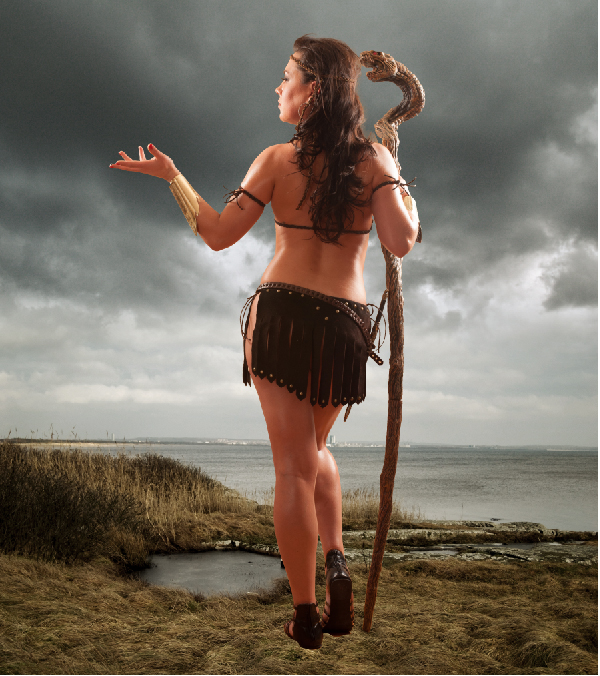
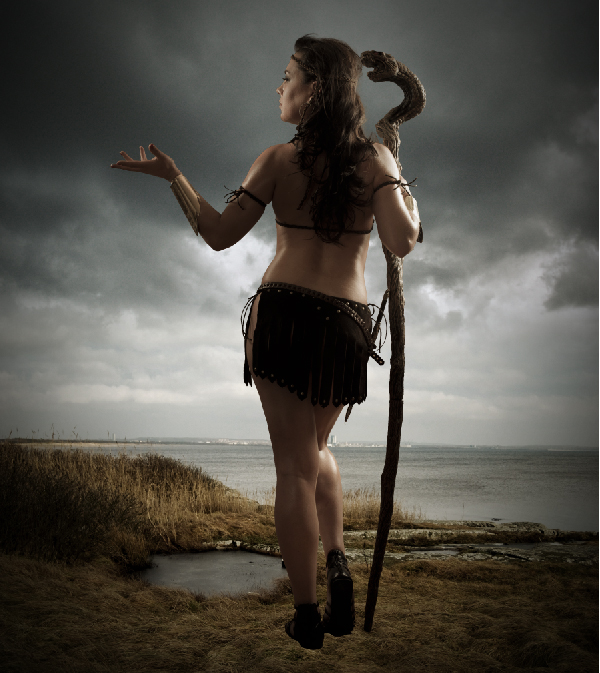
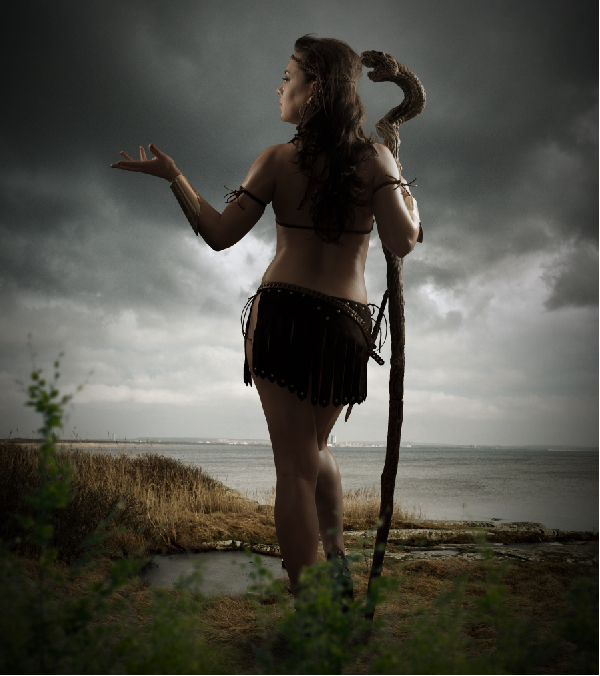
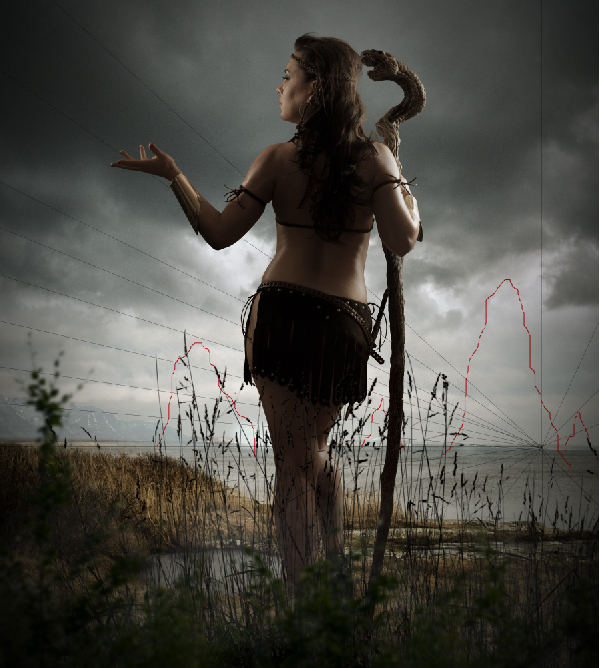
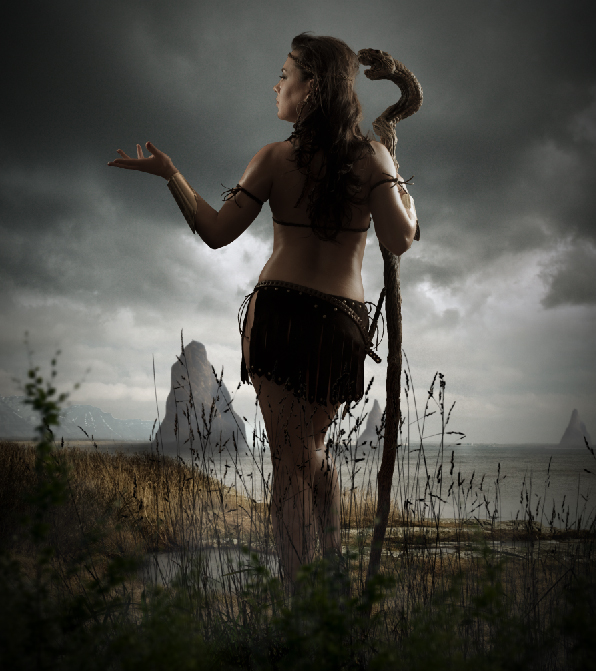
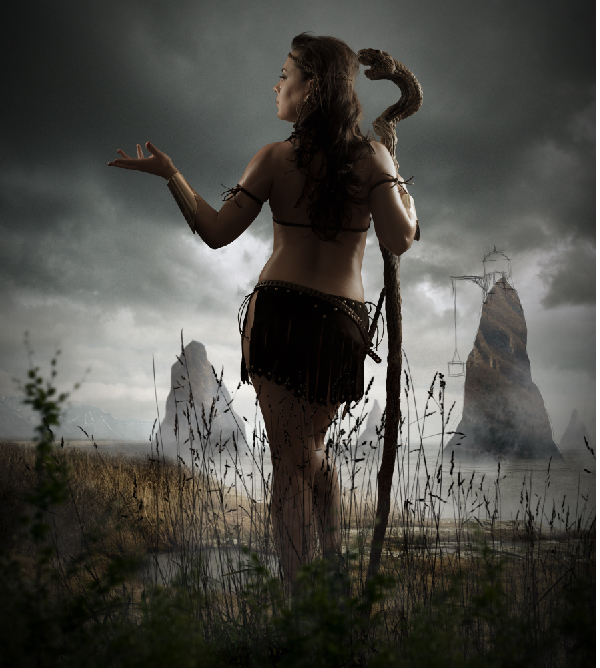
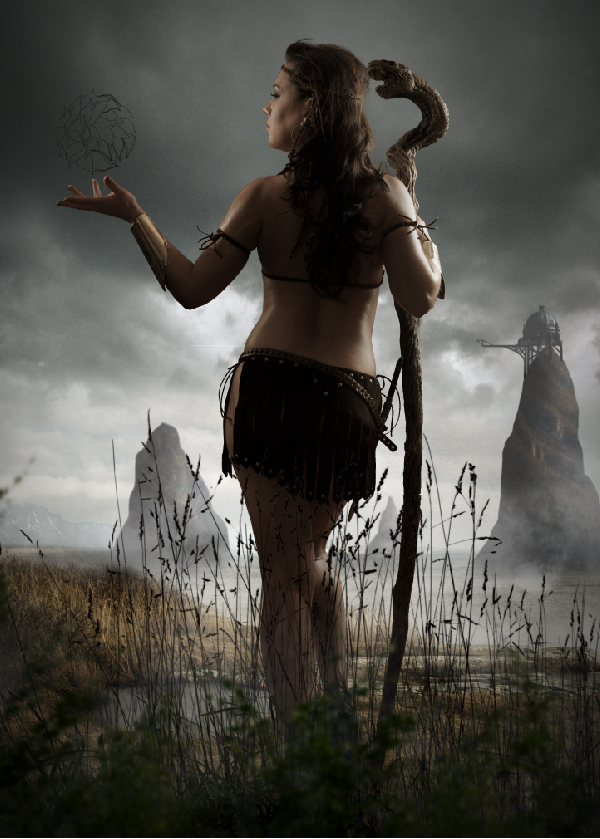
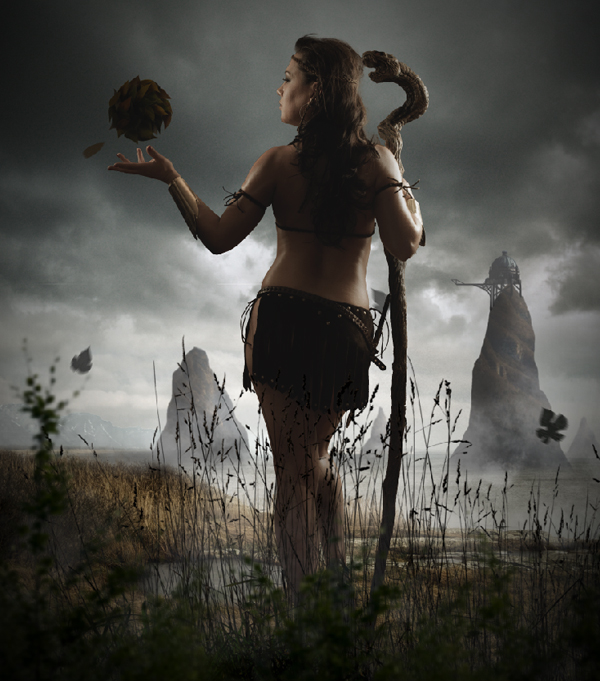
What You’ll Be Creating:
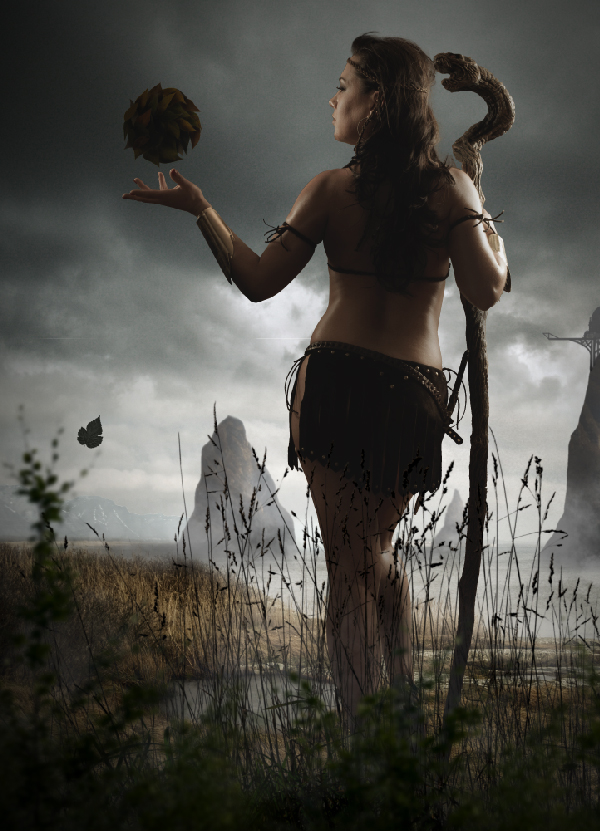
Here’s a look at the outcome you’ll be able to produce by the end of this lesson:
Resources Used In This Tutorial
- Model – jagged-eye
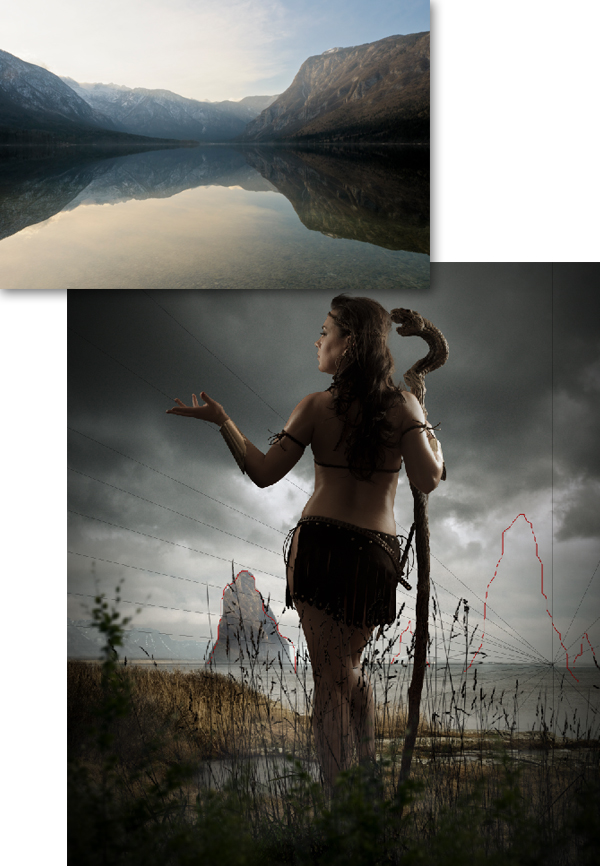
- River Side – colourize-stock
- Clouds – freeimages.com
- Leaf Textures – leaftexture.com
- Bushes – gd08
- Fog Brush – brusheezy
- Tall Grass – gd08
- Birds Brushes – lpdragonfly
- Leaves – bittbox.com
- Distant Hills – freeimages.com
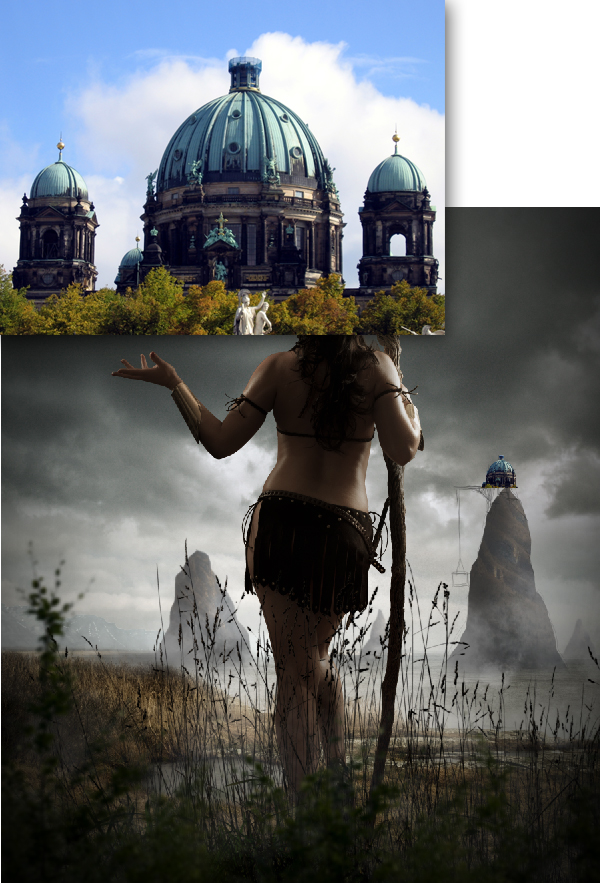
- Dome – freeimages.com
Step 1
In this step we are going to create the background scene.
1) Import the riverside image on to the canvas and place it as shown, then erase the top end of the image with a soft eraser.


2) Now import the image of clouds on to the canvas and place it behind the previous image.

Step 2
In this step we are going to color correct both the riverside image.
1) Select the riverside image and open the Exposure adjustment layer and set the Gamma Correction level to 0.81.

2) Now open the Hue/Saturation adjustment layer and reduce the Saturation level to -47. Since this is a cloudy scene we don’t want the scene to be colorful and bright, on the contrary we want it to be dramatic with low saturated colors.

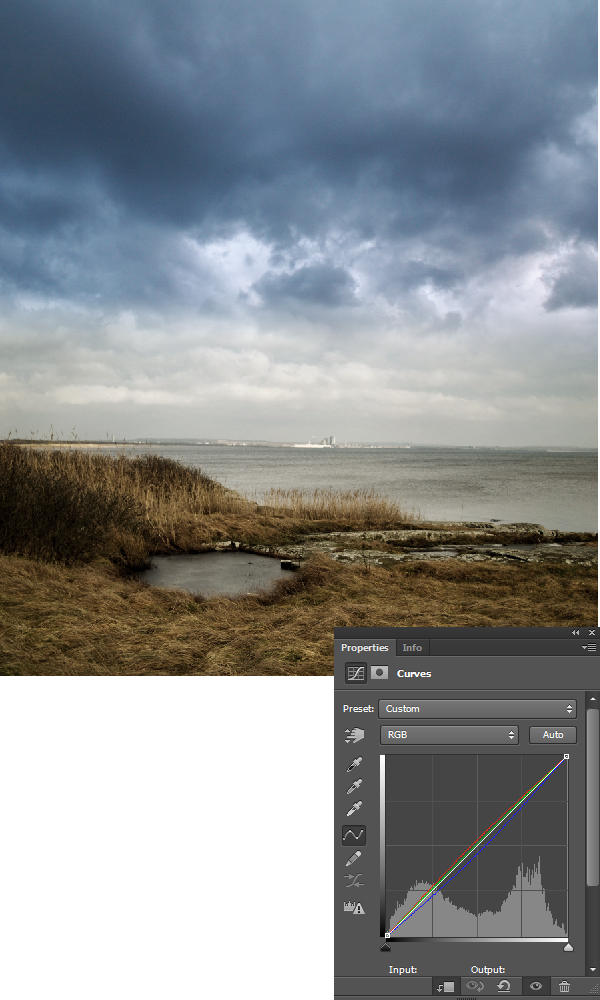
3) Now by using the Curves adjustment layer set the RGB curves as shown.
Step 3
In this step we are going to color correct the sky and blend it with the riverside image.
1) With the sky layer selected open the Curves adjustment layer and set the RGB curves as shown.

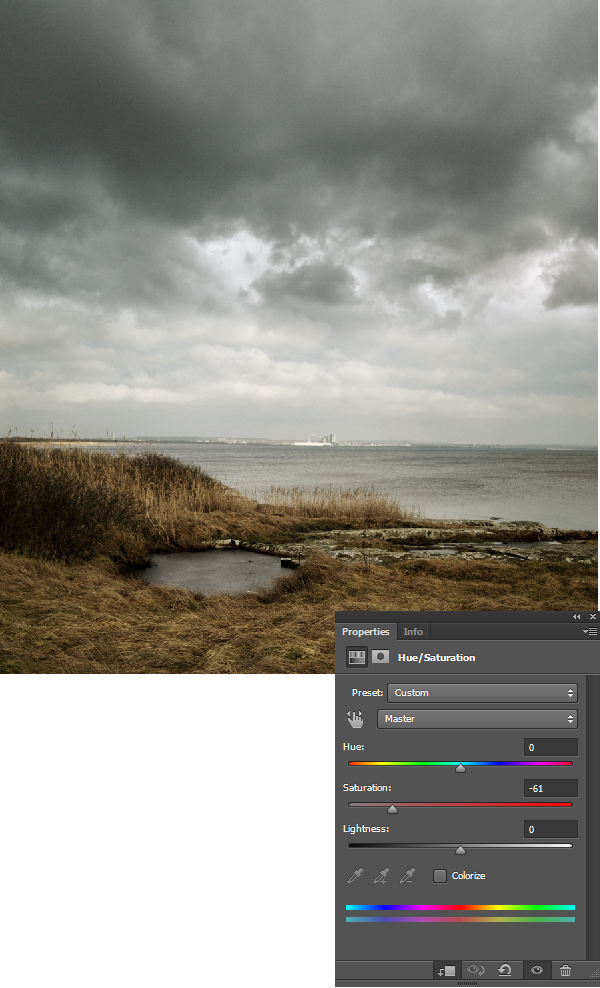
2) Now by using the Hue/Saturation adjustment layer set the Saturation level to -61.
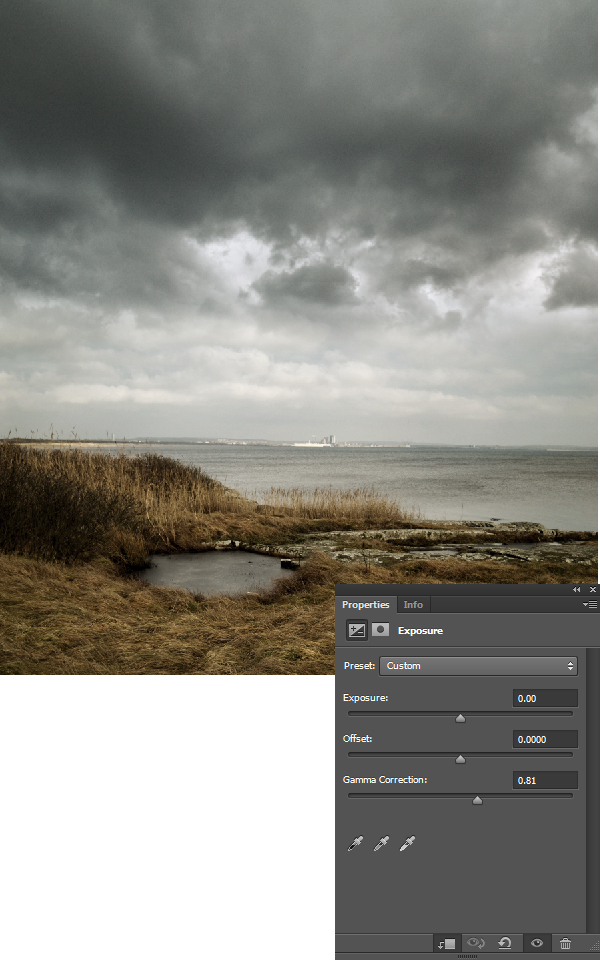
3) Now to enhance the shadows of the cloud layer open the Exposure settings and set the Gamma Correction level to 0.81.
Step 4
In this step we are going to extract the model from the source image without compromising any details.
1) Import the image of the model into Photoshop and cut the image as shown using the Pen Tool (P) or Lasso Tool (L). Leave the complex areas of the image to Refine Edge option.

2) Now select a mask around the model and open the Refine Edge option and set the Adjust Edge settings as shown. Then by using the Refine Radius Tool, paint the complex areas of the image and let the Refine Edge option work its magic. Once you are satisfied with the result, export it into a new layer.

Step 5
In this step we are going to integrate the model image in the scene.
1) Import the image of the model on to the working canvas and place it as shown.
2) Reduce the brightness of the model by decreasing the brightness of the layer to -92 using the Brightness/Contrast adjustment layer.
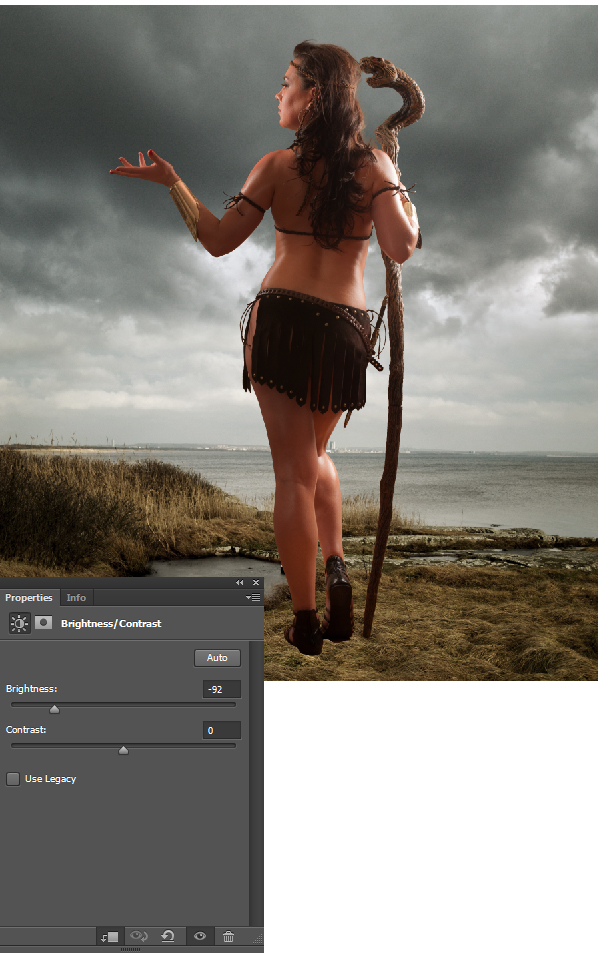
3) Now by using the Hue/Saturation adjustment layer set the Saturation level to -65.
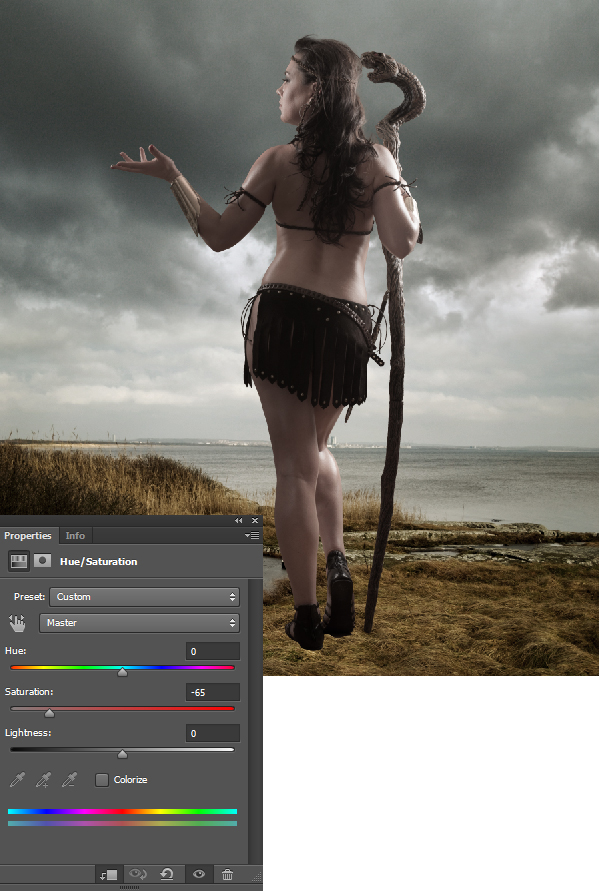
4) To enhance the shadows on the model, open the Exposure settings and set the Exposure level to -0.02 and Gamma Correction level to 0.75.

5) With the model layer selected open Curves and set the RGB curves as shown.

Step 6
In this step we will be working on painting the shadows digitally. Use of a digital pen tablet is highly recommended.
1) Create a new layer on the top of the Layers palette and paint dark edges around the scene as shown.
2) Now create a new layer above the model layer and select the soft brush and make sure the pen pressure option is ON. Then gently paint the shadows as shown.

Step 7
In this step we are going to add bushes in the scene, which are placed closer to the lens view in order to create a depth of field to the scene and make it look natural.
1) Import the image of the bushes on to the working canvas and place the bushes at the bottom of the scene as shown.
2) With the bushes layer selected go to Filters>Blur>Gaussian Blur and set the blur Radius level to 9.1px.

3) Similarly add few more bushes in the scene as shown.
4) Now create a new layer under the bushes layers and paint thin fog as shown at the bottom of the scene.

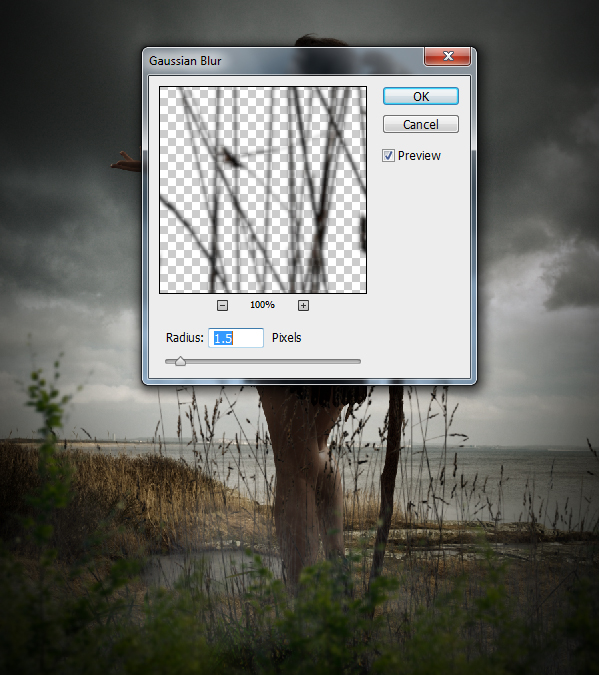
5) Now import image of tall grass and place it in the scene as shown. Make sure to place this layer under the previously created fog layer.

6) Now add Gaussian blur of Radius 1.5px to the tall grass layer.
Step 8
In this step we will be color correcting the previously added grass and plants.
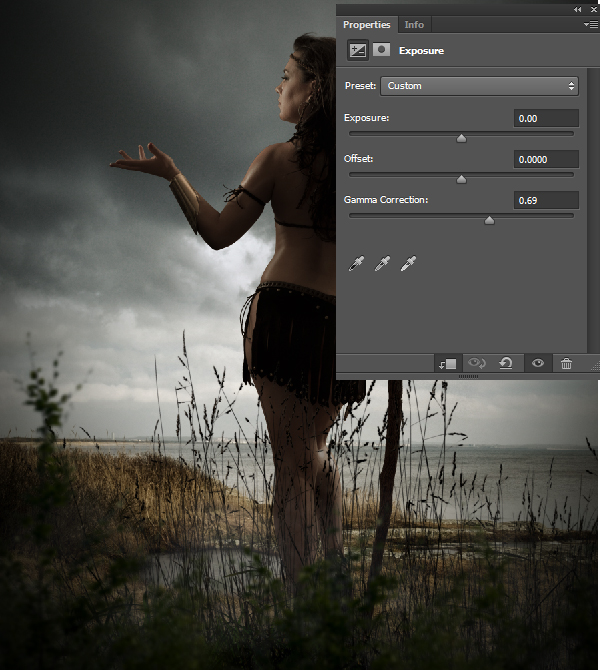
1) Group all the bushes and grass layers into a single folder and add a Hue/Saturation adjustment layer to it. Then set the Saturation level to -35.

2) Now add an Exposure adjustment layer to the folder and set the Gamma Correction level to 0.69.
Step 9
In this step we will be creating distant hills in the scene.
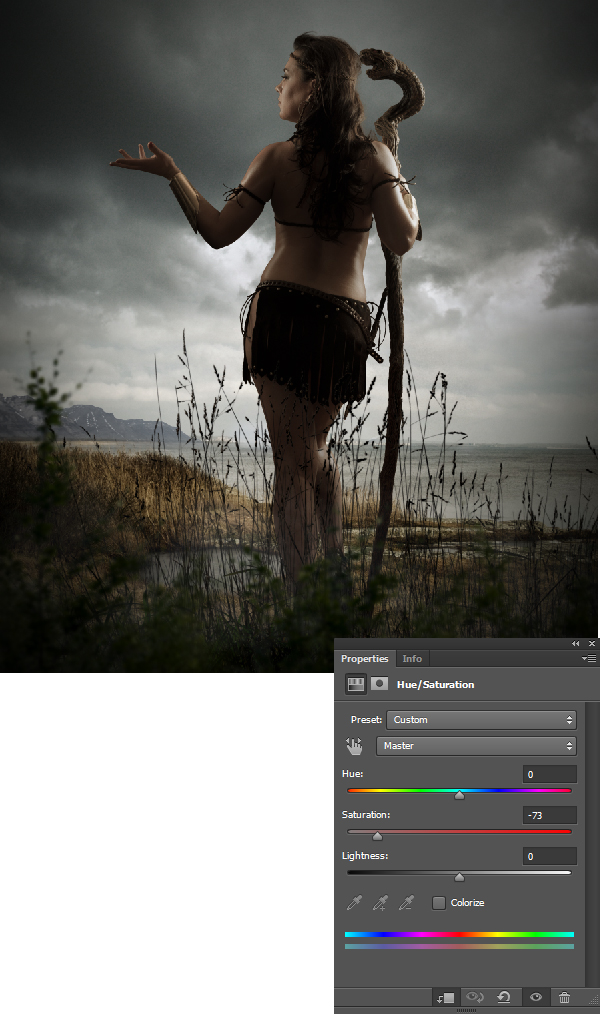
1) Import the image of distant hills on to the working canvas and place the image on the horizon of our scene as shown. Then by using the Magic wand and Eraser tool erase the sky and other unwanted part of the image.

2) With the distant hills layer selected open Hue/Saturation and set the Saturation level to -73.
3) Now by using the Curves adjustment layer set the RGB curves as shown.

4) Since the scene is filled with fog and clouds the distant hills should be almost mixed with the fog in the scene. Hence add an Exposure adjustment layer and set the Offset level to +0.1589 and Gamma Correction level to 1.25.

Step 10
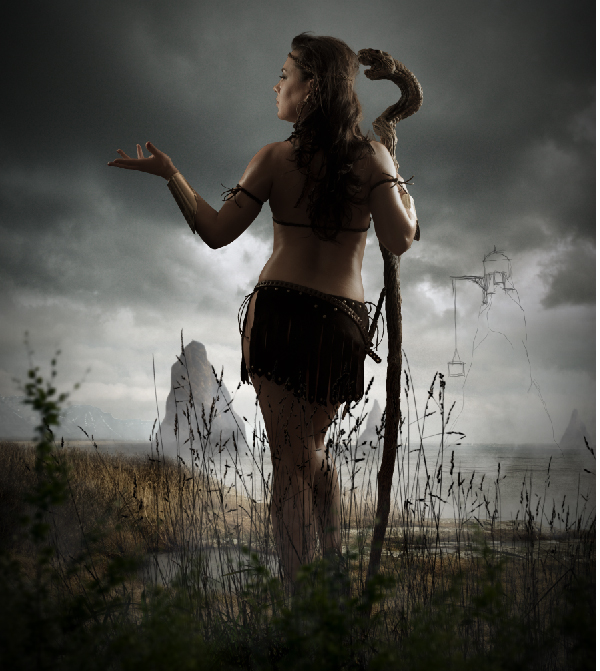
In the following steps we will be creating few vertical tower hills in the scene. So, it’s always better to have a blueprint of the concept before proceeding with it. Hence by using the Line tool draw the prospective lines and draw a rough sketch of the tower hills in a new layer as shown.
Step 11
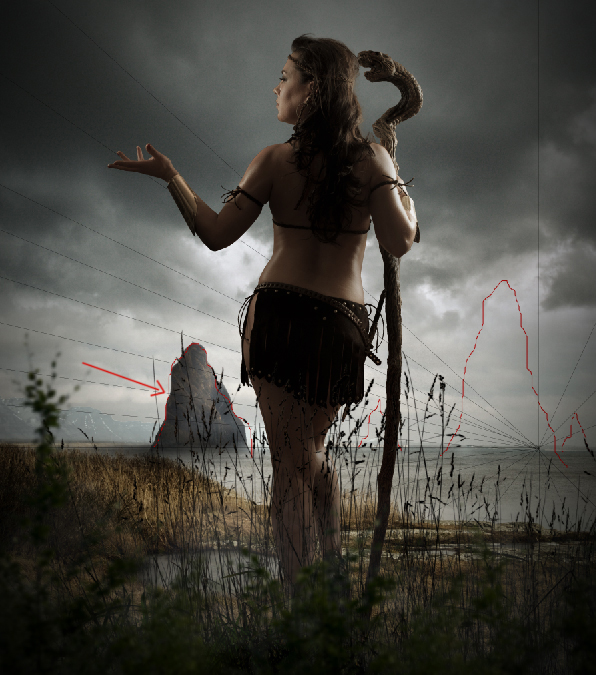
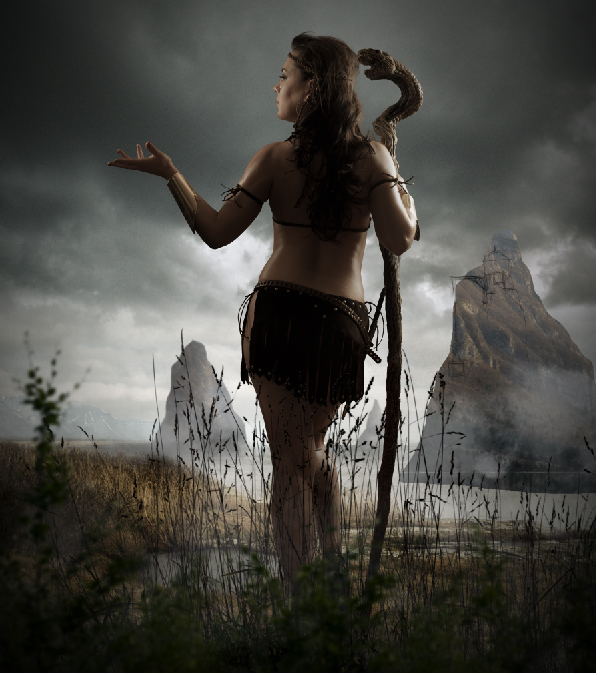
In this step we are going to create the tower hill based on the concept created in the previous step.
1) Cut a rough patch of the distant hill from the source image and import it on to the working canvas and then trim it in the shape of the concept outline.
2) Create a new layer over the hill layer and paint dark shadow on the left side of the hill as shown.
Step 12
In this step we are going to create a reflection of the hill on the water surface.
1) Duplicate the previously created hill and flip it vertically and place it as shown.
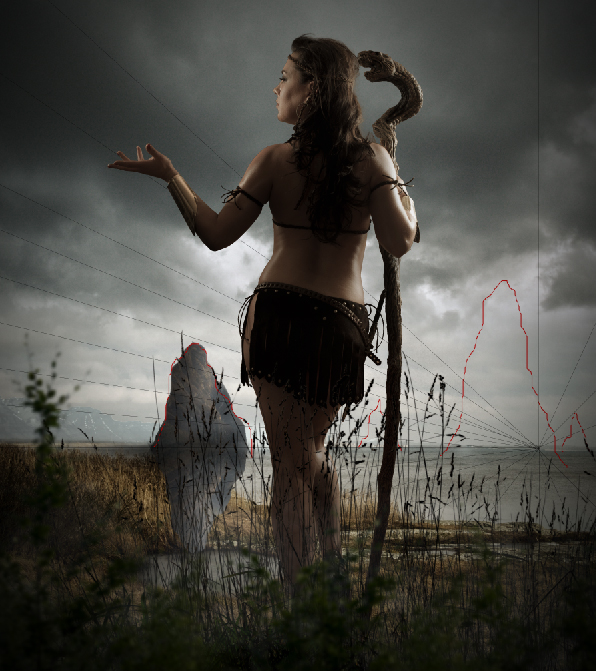
2) Now erase the inverted hill image as shown. The reflection might not be very clear in the scene, but every small detail covered can lead to a more believable outcome.

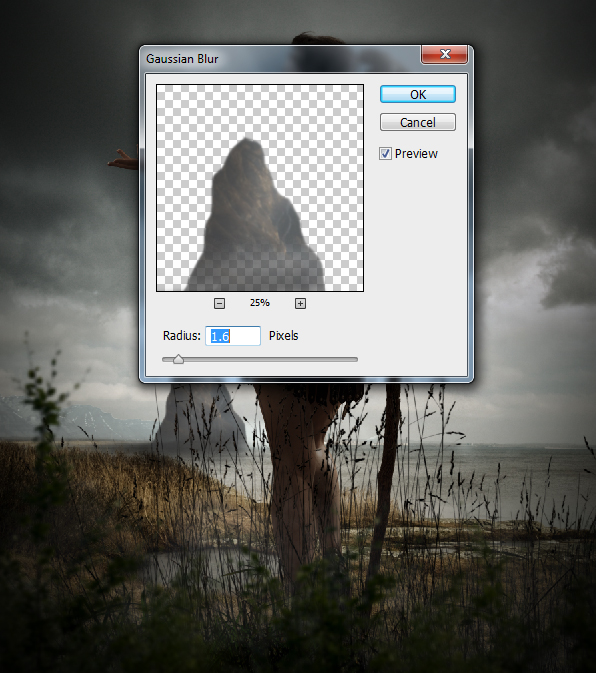
3) Now merge all the hill layers and add an Exposure adjustment layer to it and set the Offset level to +0.0346 and Gamma Correction level to 1.06.

4) To add depth to the scene and hill, add a Gaussian Blur of Radius 1.6px.
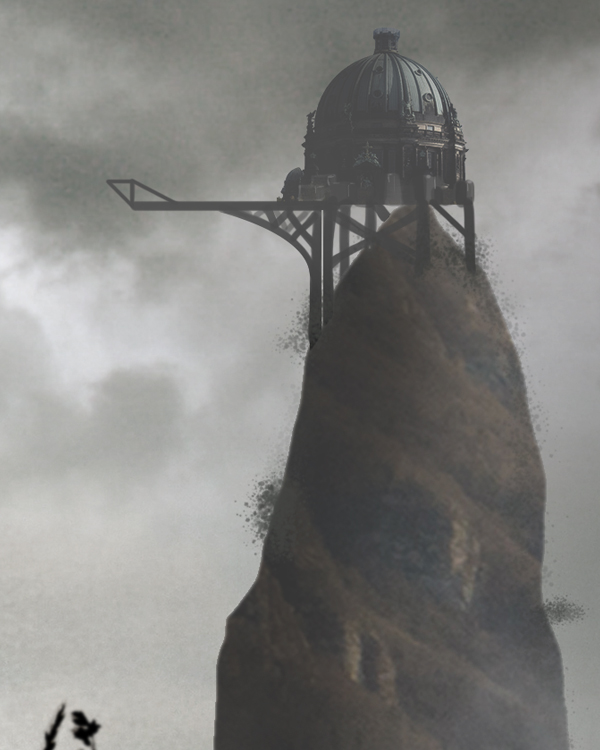
Step 13
Similarly create a couple more of the tower hills as shown based on the concept sketch.
Step 14
Now create a new layer above the hills layers and paint thick fog as shown in the scene, using the fog brush.

Step 15
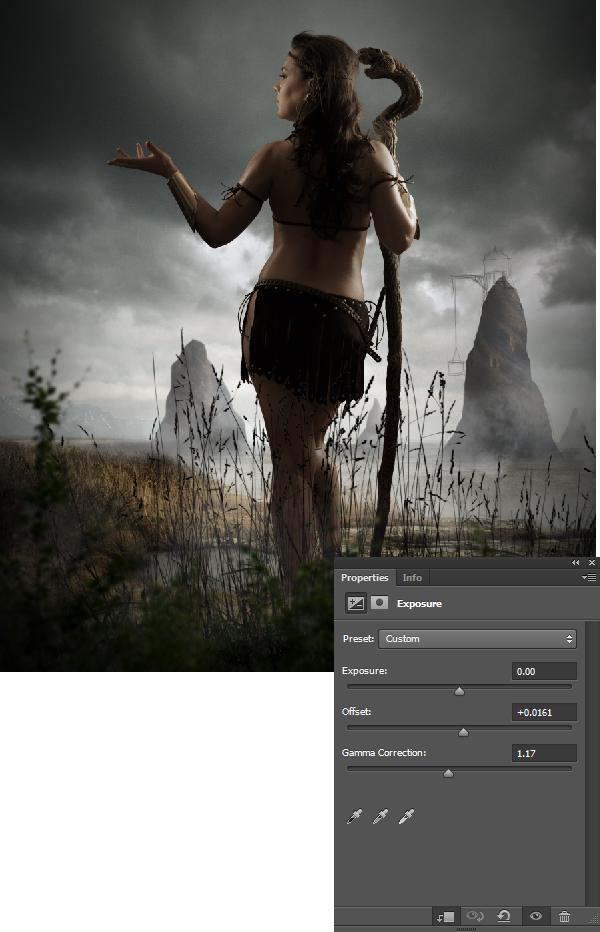
In this step we are going to create another tower hill with an operating base on the top of the hill.
1) Draw a rough sketch of the new tower hill in a new layer as shown.
2) Now import the roughly cut texture of a hill and place it as shown in the scene.
3) Using the Lasso Tool (L) cut the hill texture in the shape of the tower hill as per the sketch.
4) Create a new shadow layer on the top of the hill layer and paint the shadow as shown on the left side of the hill.
5) To make it blend with the environment create an Exposure adjustment layer to the tower hill and set the Offset level to +0.0161 and Gamma Correction level to 1.17.
Step 16
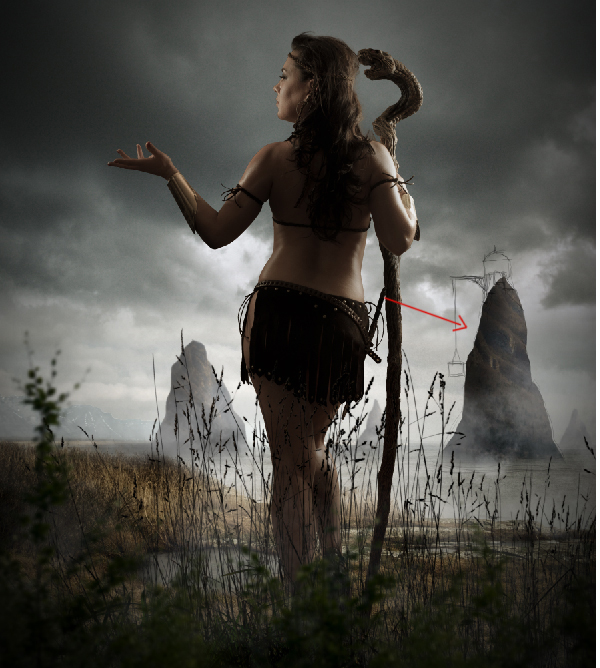
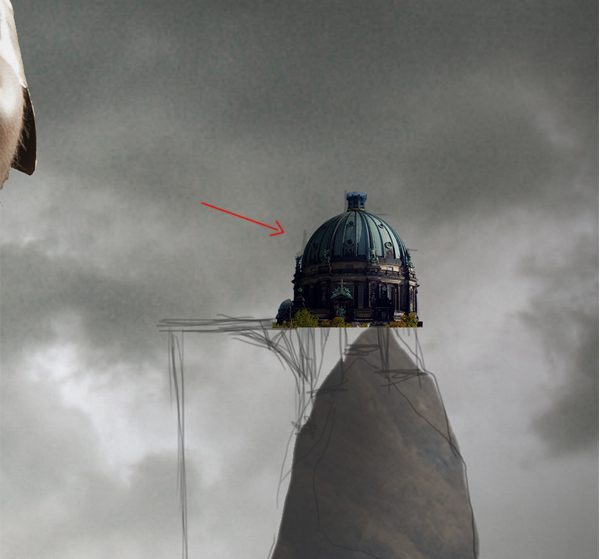
In this step we are going to create a dome on the top of the previously created tower hill.
1) Cut the image of the dome from the source image using the Magic Wand Tool (W) and place it on the tower hill as shown.
2) Now create a new layer over the dome layer and paint dark shadow on the left side of the dome as shown.
Step 17
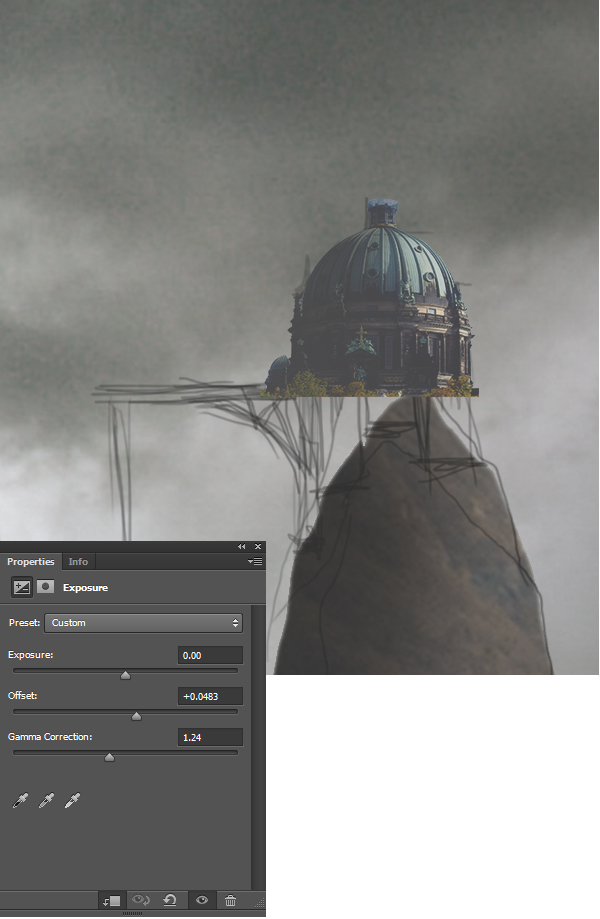
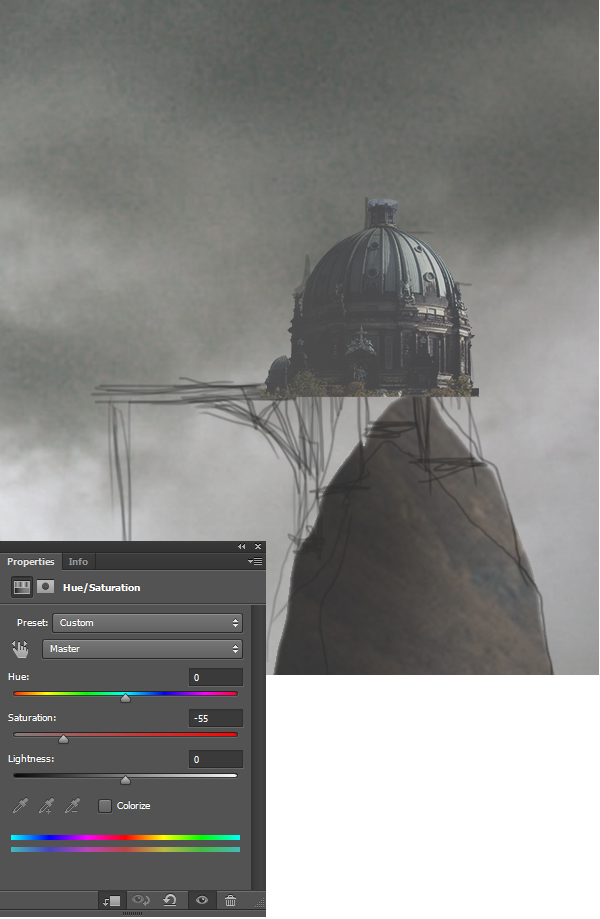
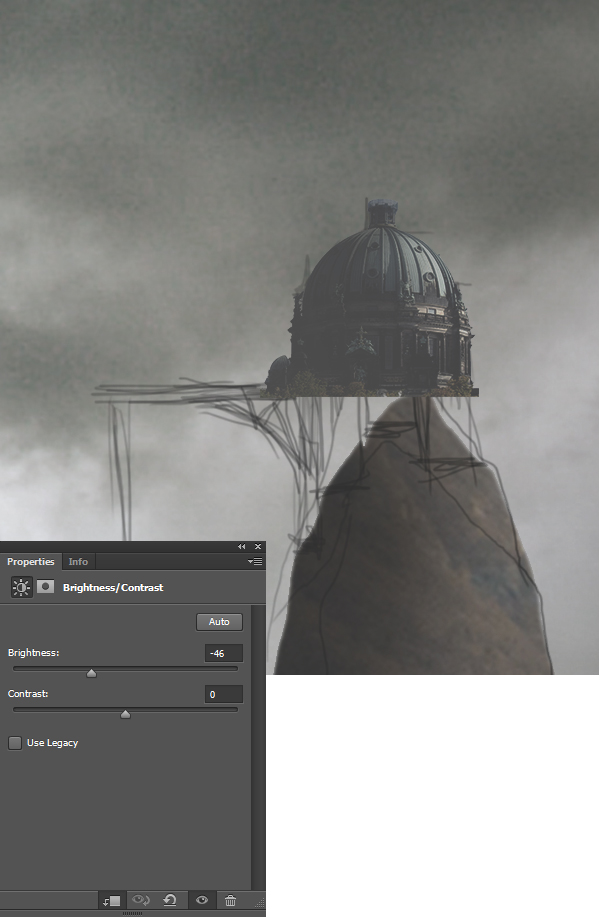
In this step we are going to color correct the dome to blend it with the environment.
1) With the dome layer selected open the Exposure settings and set the Offset level to +0.0483 and the Gamma Correction level to 1.24.
2) Using the Hue/Saturation de-saturate the dome by -55.
3) Also we don’t do not want the dome to be too bright, hence reduce the Brightness of the dome to -46 using Brightness/Contrast.
Step 18
In this step we are going to paint the base structure of the dome. Which supports the dome on the top of the hill.
1) Using the color #4d4d4d paint the base structure on a new layer as shown.

2) Now create another layer on top of the dome layer and paint few randomly placed box as shown. (The dome is actually a storage dock that collects supplies from the trade ships and stores there, till its necessary.).
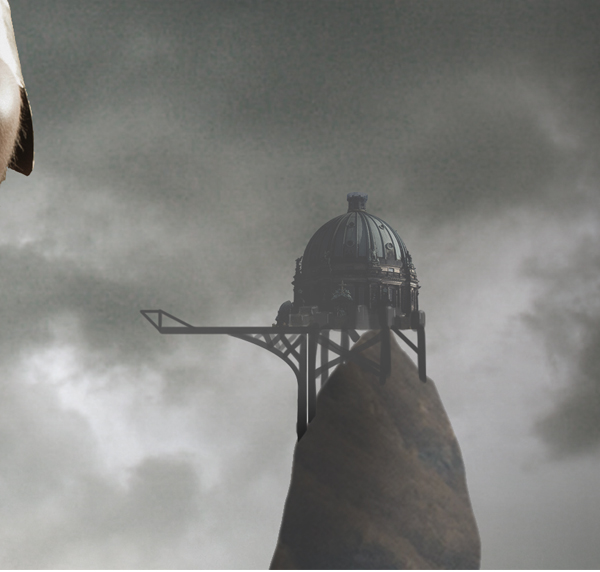
Step 19
In this step we are going to add final details to the dome and the hill.
1) Now paint some random bushes on the hill using the color # 50524f.
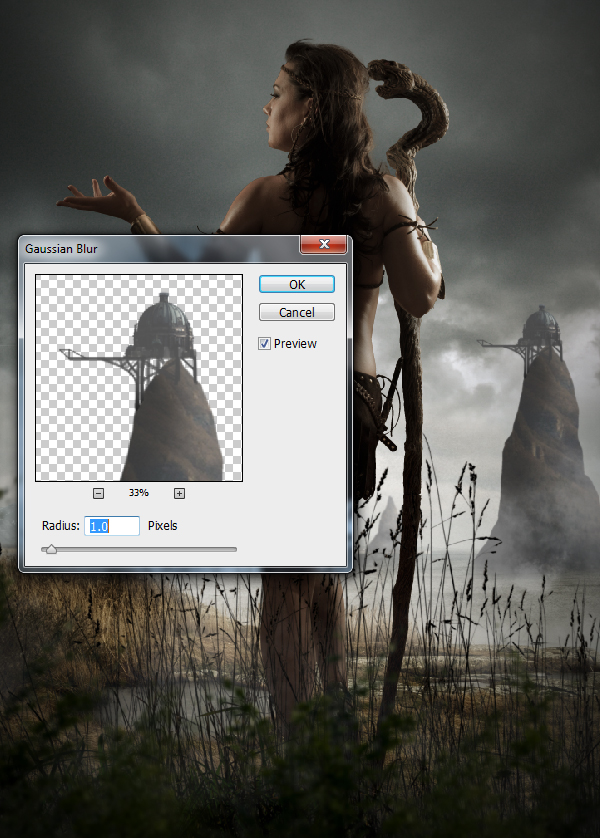
2) Now merge all the dome and hill layers together and add a Gaussian Blur of Radius 1.0px.
Step 20
In this step we are going to create a leaf ball floating just above the left hand of the model.
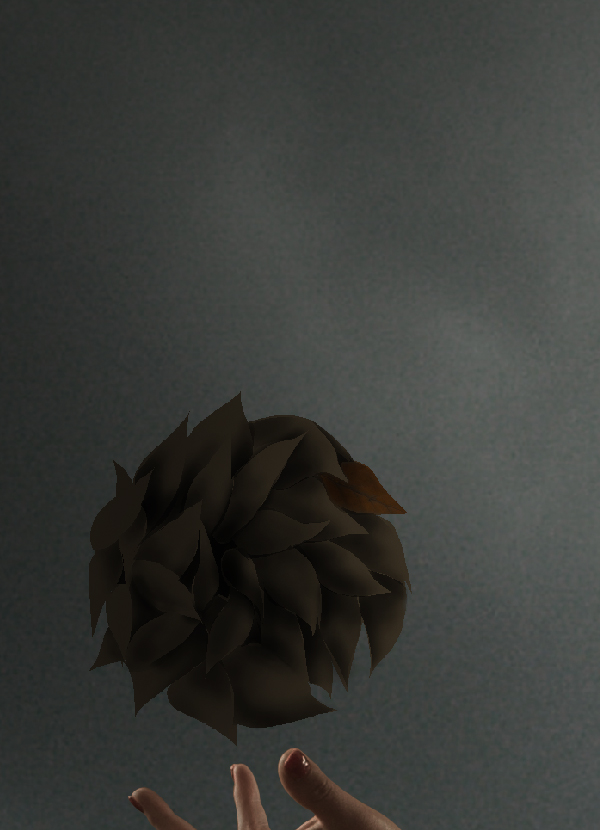
1) Create a new layer over the model layer and paint a rough sketch of the leaf ball as shown.
2) Now create another new layer under the sketch layer and paint the leaves of the ball as shown. This is a slight
time consuming process but worth it.

3) By using a soft round brush paint dark shadow on the left side of the ball as shown.

Step 21
In this step we are going to add texture to every leaf of the ball individually. This is the most time consuming process, but the out of it will make you forget of the time spent.
1) Import the image of a leaf texture and place it on the leaf ball as shown.

2) Now cut the leaf texture in the shape of the leaf of the ball.
3) Follow the same procedure on every leaf and complete the texturing.
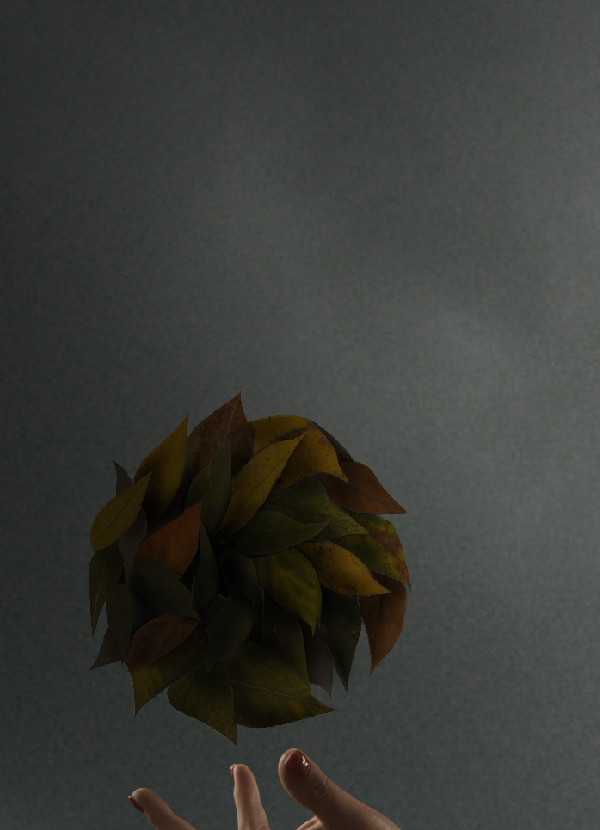
4) Group all the leaf ball layers including the textures into a folder and add an Exposure adjustment layer to it. Then set the Exposure level to -0.57 and Gamma Correction to 0.70.

5) Now add Hue/Saturation adjustment layer to the folder and set the Saturation level to -35.

Step 22
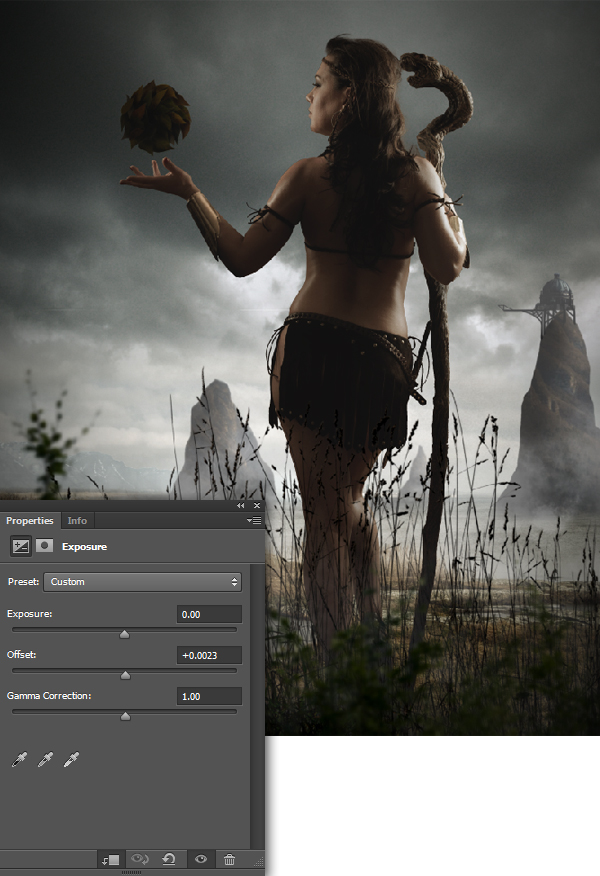
Slightly reduce the intensity of the black in the scene by increasing the Offset value to +0.0023. It’s just a minor unseen detailing, which adds to a dramatic outcome in the end.
Step 23
In this step we are going to create leaves flying towards the leaf ball. To create an illusion, that the leaf ball is being formed by random leaves from the surrounds. Just like the Goku creates his energy ball in Dragonball Z.
1) Import an image of a leaf on to the working canvas and place it on the left side of the scene as shown.
2) Since the leaf is flying towards the leaf ball, add a Motion Blur with Angle 60 and Distance 31px.

3) Now by using the Exposure settings set the Offset value to +0.0299. This will blend the leaf perfectly with the environment.
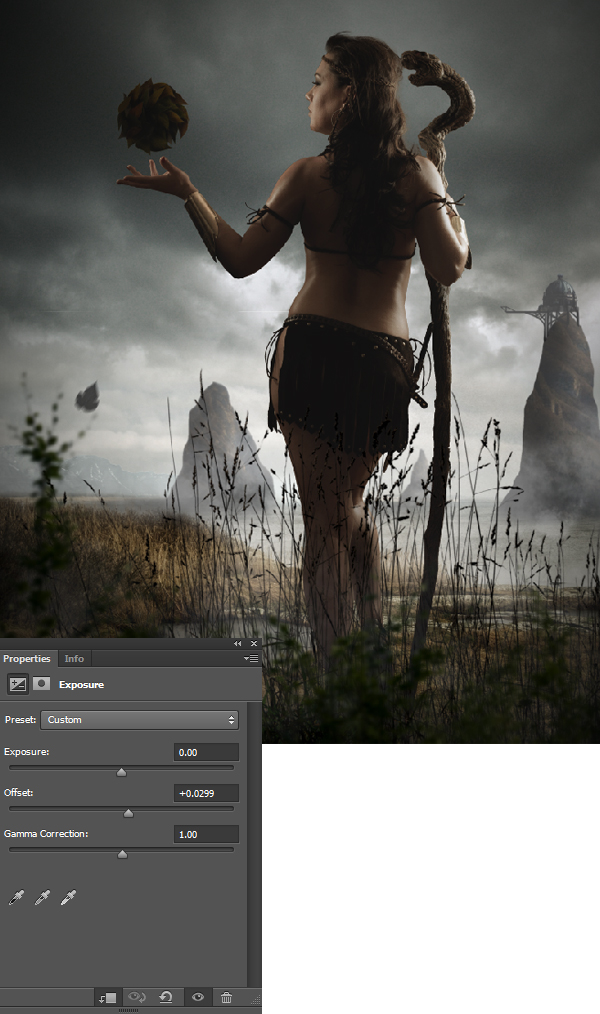
4) Similarly add few more leaves in the scene.
Congratulations, You’re All Done!
Awesome job making it this far! You should be proud of what you’ve created. Show it off to your friends and colleagues and get some feedback.
You can also comment here with your version, or any questions you had about the techniques used. We love to see what you guys create and we’re always here to give helpful feedback and tips to help you to improve.
Subscribe: www.aayugcreaton.com
0 Comments