We’ve been getting a lot of questions recently about how to achieve an underwater effect in your photo manipulations. This is definitely something that can be tricky, and look bad if done wrong.
Today’s tutorial will show you how to photo manipulate a fantasy woman, floating in an underwater setting. There’s tons of great techniques in this tutorial, including lighting, colouring, blending, detailing and much more. By the time you’ve completed this lesson you’ll be able to create a realistic underwater effect.
Let’s get started!
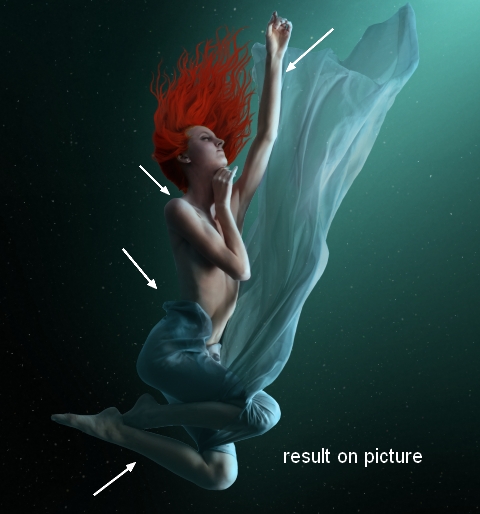
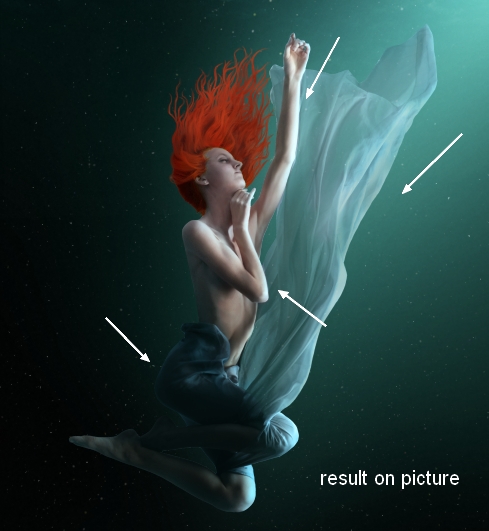
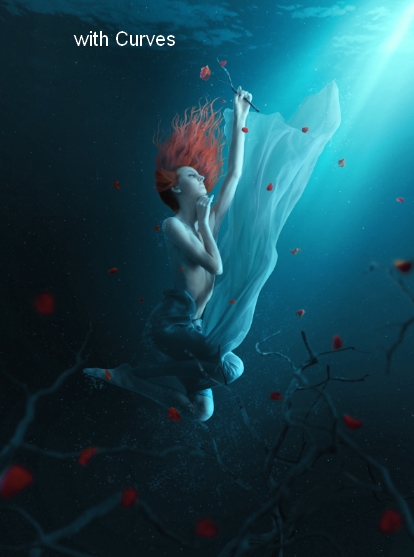
What You’ll Be Creating:
Here’s a look at the outcome you’ll be able to produce by the end of this lesson:
Resources Used In This Tutorial
Step 1
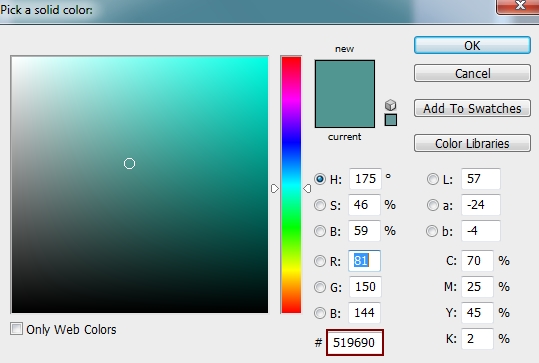
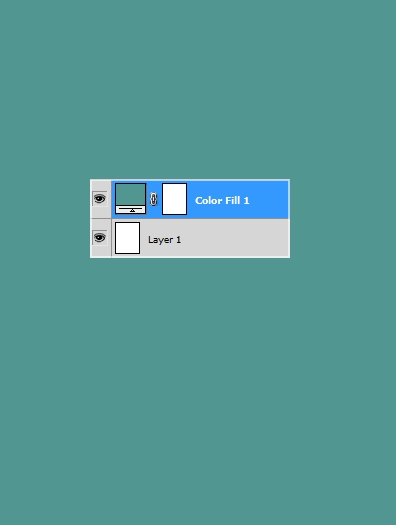
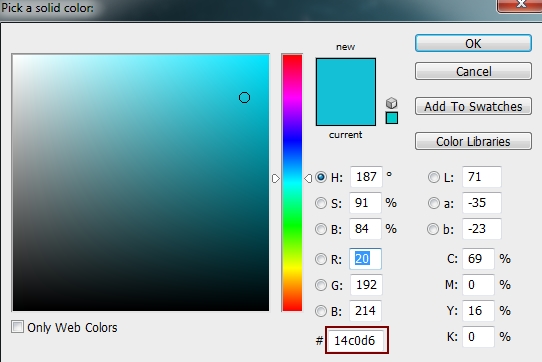
Create a new document and fill it with white. The ratio between width/height of my canvas is 3/4 but feel free to make your own. Go to Layer-New Fill Layer -Solid Color:
Step 2
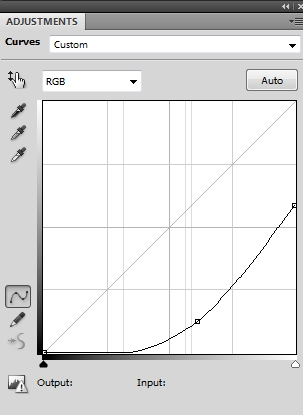
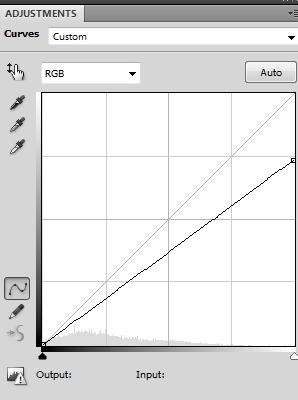
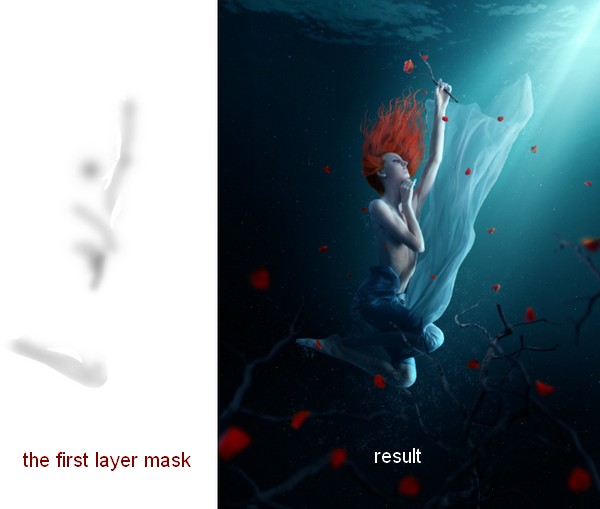
Go to Layer-New Adjustment Layer-Curves to darken the picture:
On Curves layer mask, press B to active Brush Tool. Use black brush with opacity about 20-25% to reduce the dark at the top right of the picture ( where we’ll add main light source to). You can see how I did it on layer mask and result on picture:

Step 3
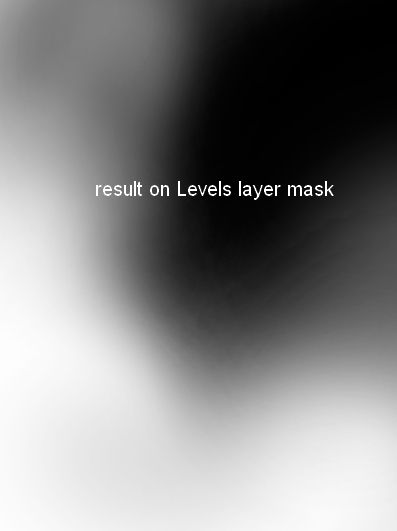
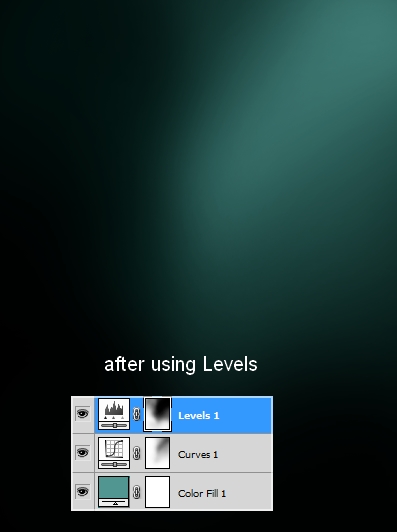
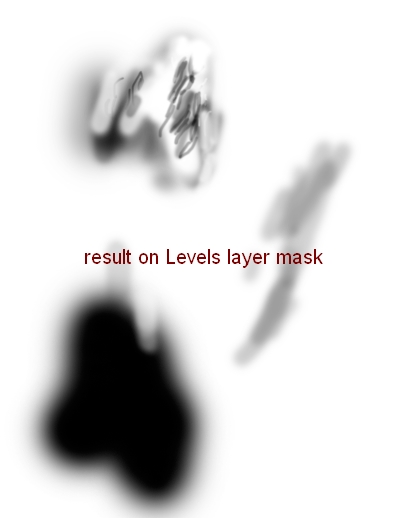
To increase the contrast I used a Levels layer:
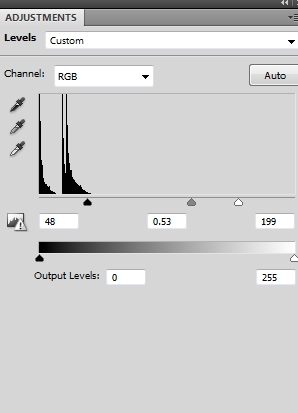
On Levels layer mask, I varied brush opacity from 20 to 100% to erase the top right:
Step 4
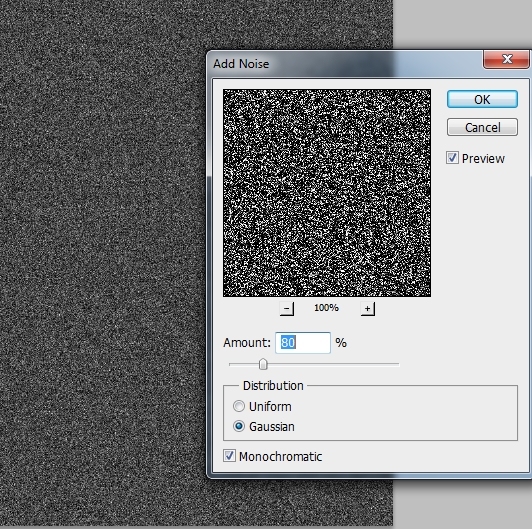
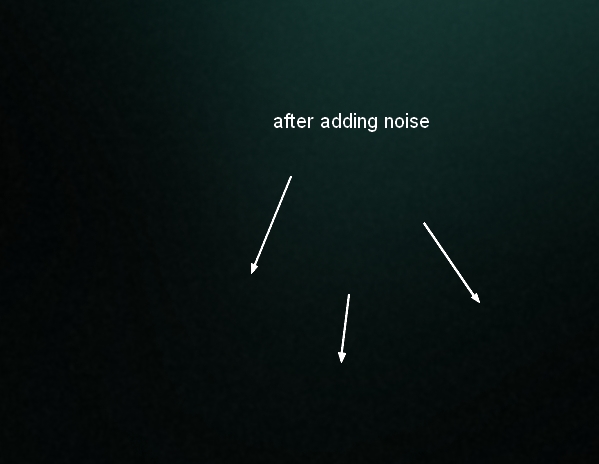
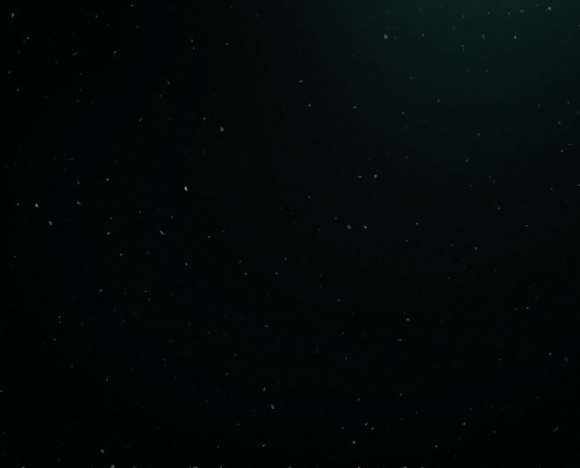
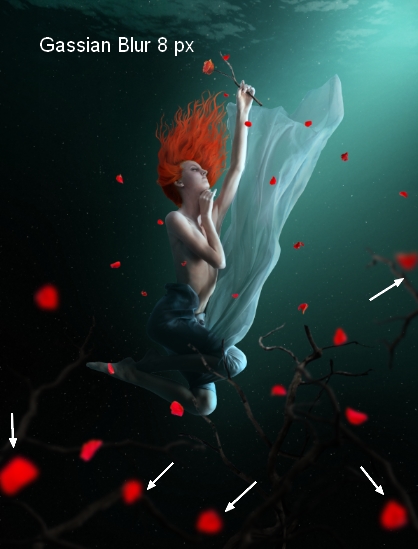
We’re creating an underwater environment. If you look closely at many underwater photographs, especially at natural environments, you’ll see the noise, debris, plankton, etc…To imitate this effect, make a new layer on the top and fill it with black (Shift+F5). Convert this layer to Smart Object. Go to Filter-Noise-Add Noise:
Choose Filter-Blur-Gassian Blur and pick radius as 1.5 px:

Change the mode to Screen 5%. The change might not be noticed at looking the whole pic so I took a close-up of the bottom left :

Step 5
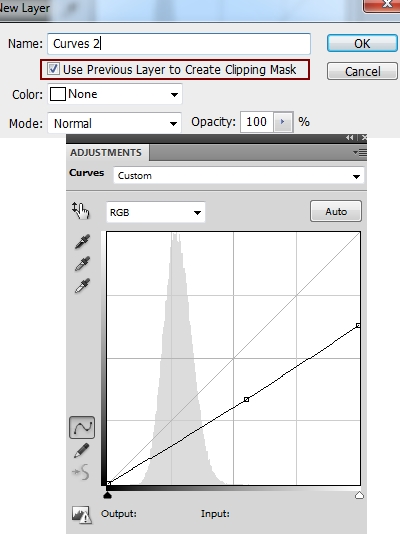
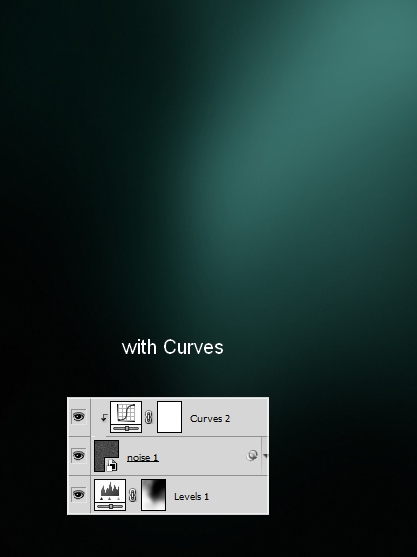
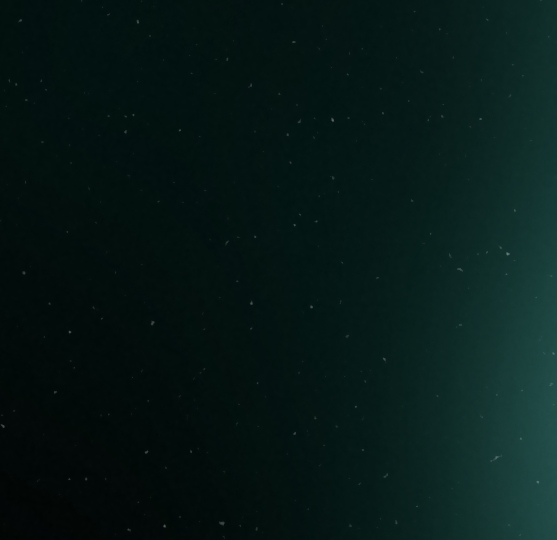
I added a Curves layer with Clipping Mask to darken this effect a little:
Step 6
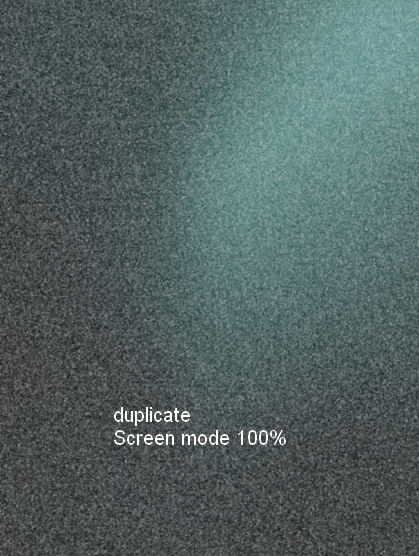
Duplicate this layer and set the opacity at maximum (Screen mode 100%) :
Click the second button at the bottom of Layer Pallete to add mask to this layer. Use black brush to erase the top right :

Step 7
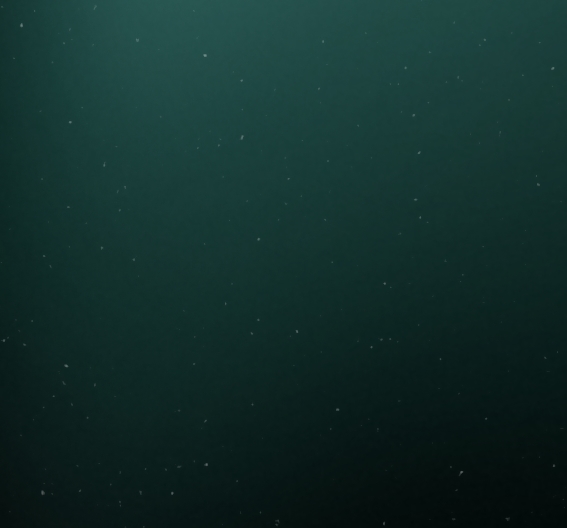
To enhance this effect I used a Levels layer:
Here are some close-ups of the result:
Step 8
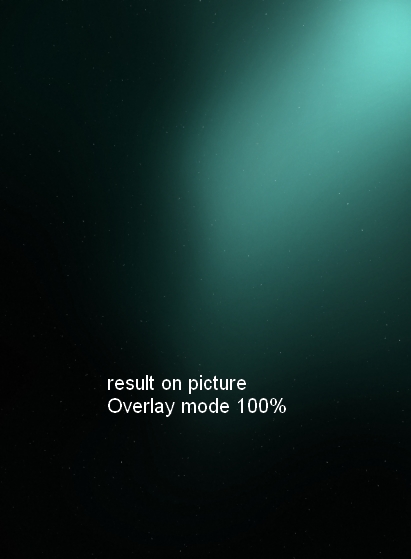
Make a new layer and use soft white brush to paint on the pic. I changed the mode to Overlay 100% and used layer mask to erase unwanted parts:


Step 9
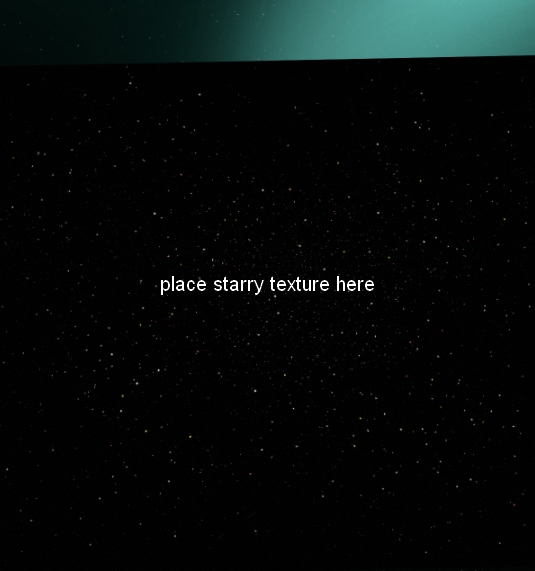
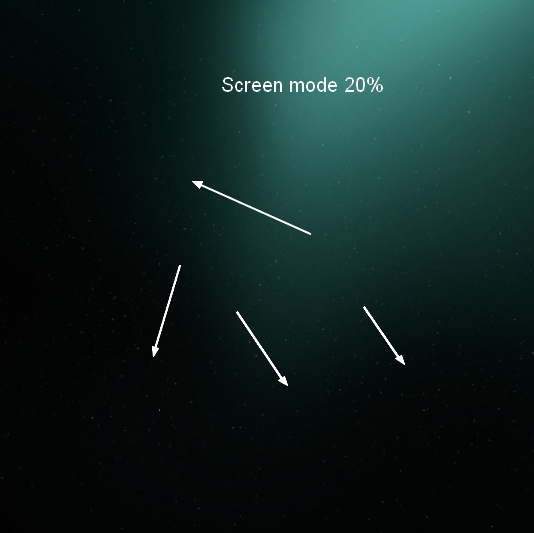
To add more details to underwater effect, I used starry texture. Choose the first one and place it at the bottom of our image, change the mode to Screen 20%:
Step 10
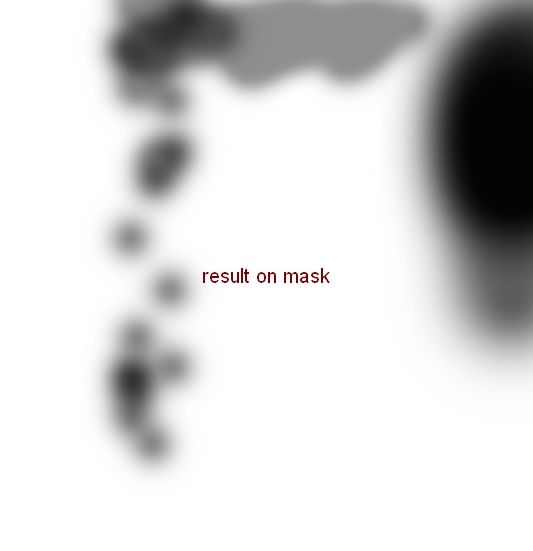
Duplicate this layer and increase opacity to 60%. Move it to the top right and use layer mask to reduce opacity of the effect as shown below:

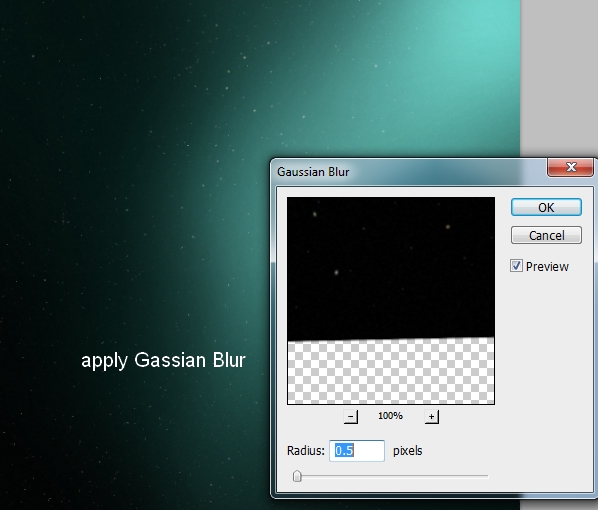
Apply Gassian Blur for this layer:
Step 11
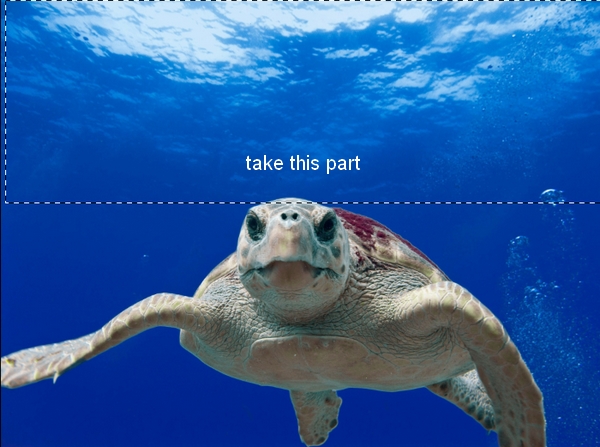
Open underwater stock. Use Retangular Marquee Tool (M) to choose the top of this picture and drag it with Move Tool (V) onto the top of our main canvas:

Change the mode to Soft Light 100%. Use layer mask to remove hard edge and blend it with background:

Step 12
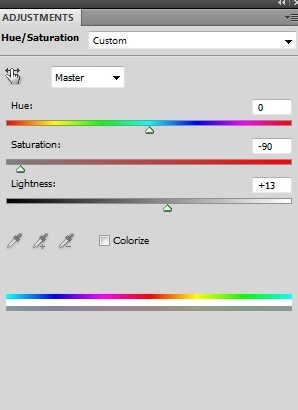
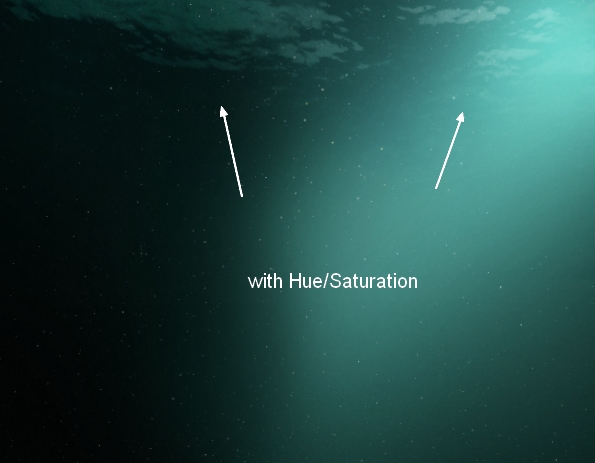
Create a Hue/Saturation layer to match color of this part with the scene:
Step 13
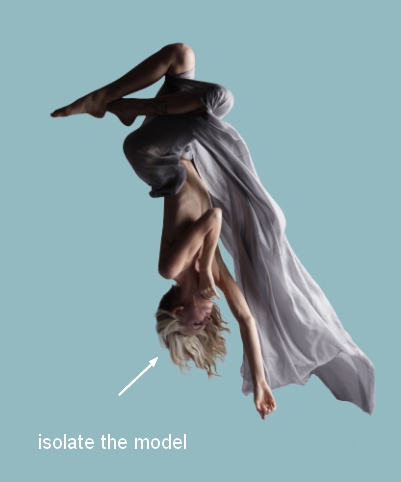
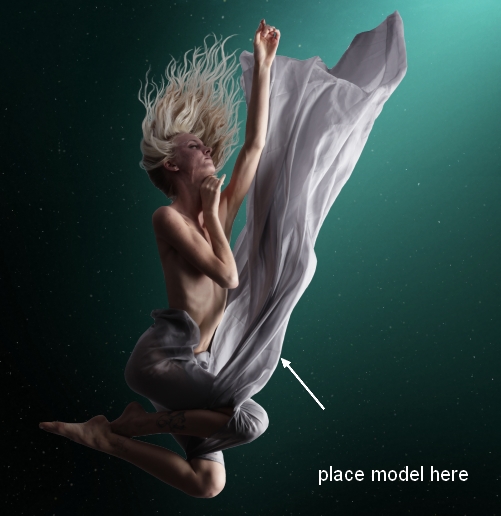
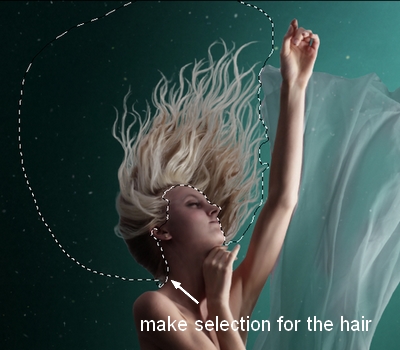
Open model stock and isolate her from background :
Step 14
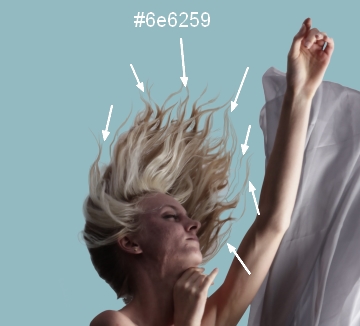
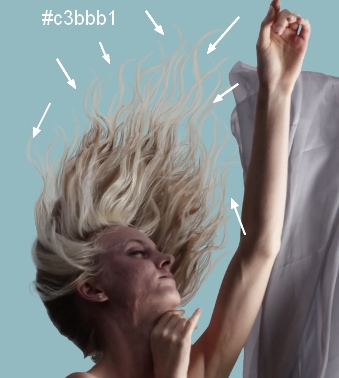
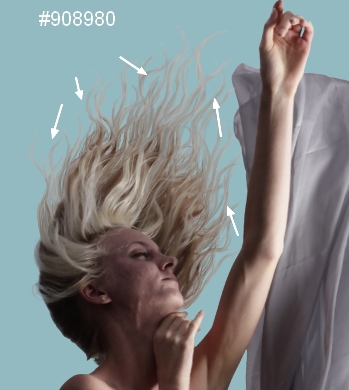
In this step I’m going to paint more hair for the model (If you don’t want to do it, you can use hair brushes instead). I’ve picked several colors from model hair (#6e6259, #7a6859, #302725, #908980, #c3bbb1) and drawn strands following light, shadow and direction of the original . Press F5 to change settings of the brush to Pen Pressure:

Here is my process of painting (I rotated the model so you can see it more obviously). Remember you must vary brush sizes for painting small or bigger strands:


Step 15
Merge extracted model layer and hair ones. Place this layer at the center section of the pic:
Add layer mask to this one. Use soft black brush with opacity about 30% to make the flying fabric appear translucent:

Step 16
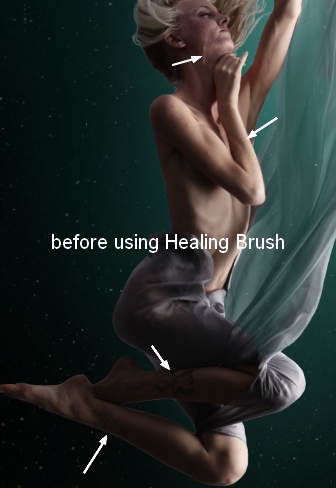
We’ll start retouching the model with some tools of Photoshop. First make a new layer with Clipping Mask. Use Healing Brush tool (J) to remove tattoos on the legs and refine some details on the face and arm:

Step 17
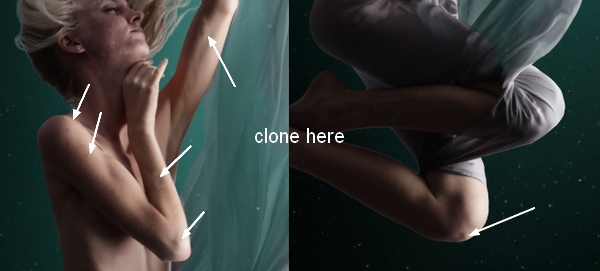
Create a new layer and active Clone Tool (S). Use it to remove some details on model arms and knee:

Step 18
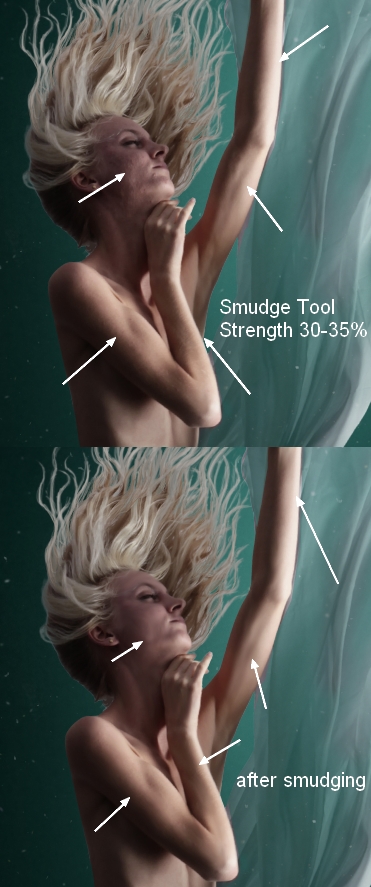
In this step I used a new layer with Smudge Tool , Strength about 30-35% to soften model skin. The working area includes the face, arms and legs:

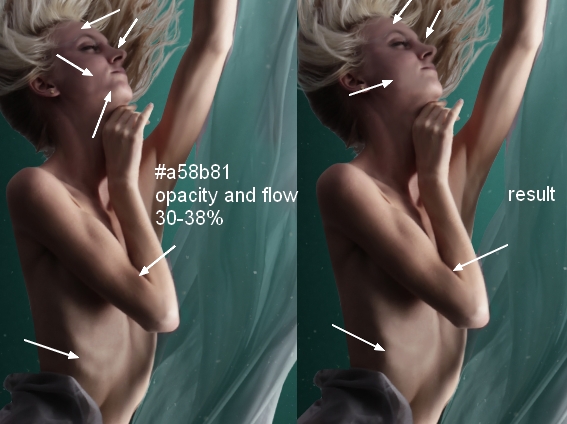
Step 19
On a new layer I used soft brush with color #a58b81, opacity and flow about 30-38% to paint on the face, arm and waist to brighten and soften the skin there:
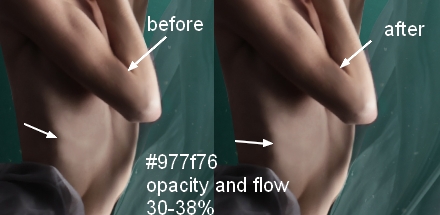
Step 20
Make a new layer, use brush with color #977f76 with same opacity and flow to paint on some details of the arm and waist to refine skin color there, also blur the vein :
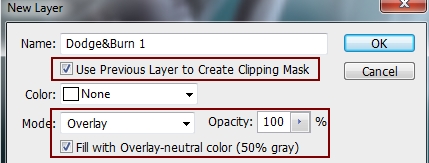
Step 21
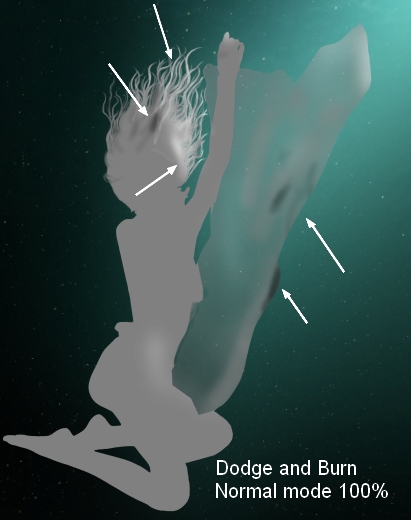
Make a new layer, change the mode to Overlay 100% and fill with 50% gray:
Take Dodge and Burn with Midtones Range, Exposure about 20-25% to refine the facial details, waist, also re-define the light there a bit. You can see how I applied this tool with Normal mode and result with Overlay mode:

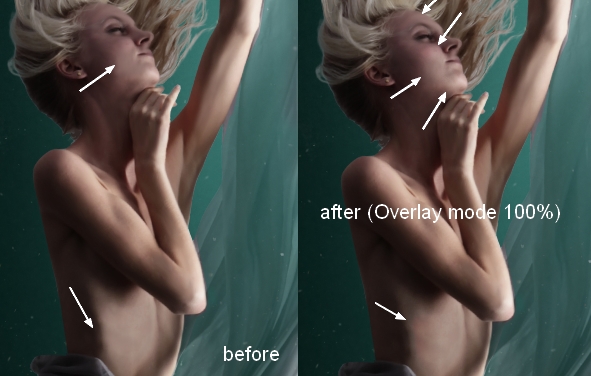
You can see that the model looks fuller now.
Step 22
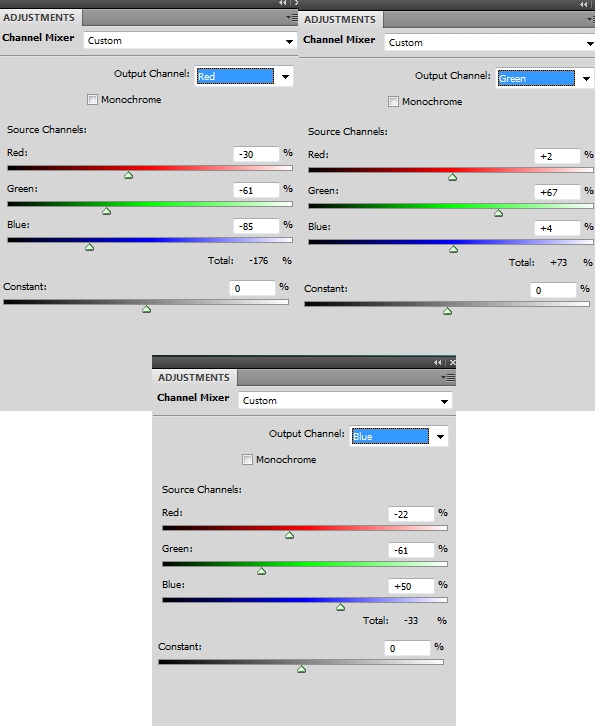
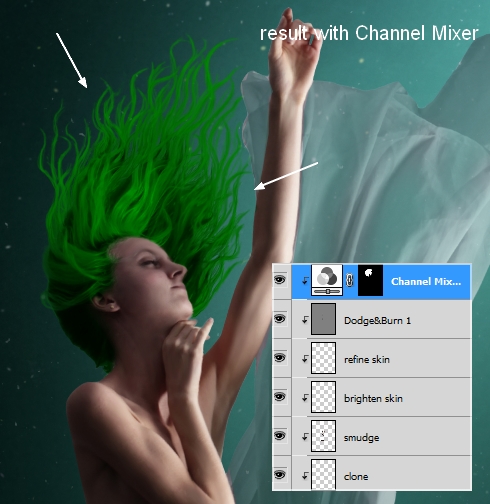
We’ll go through very interesting steps. I found that the hair color looks ordinary and wanted to make it pop. A red/orange hair would stand out from a cyan/bluebackground. To do it in a non-destructive way, I used Lasso Tool to choose hair part only, then chose Layer-New Adjustment Layer-Channel Mixer (remember to check Clipping Mask options):
Step 23
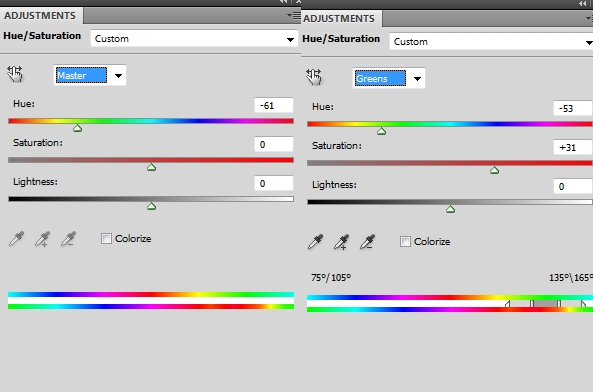
Hold the Cmd/Ctrl while clicking Channel Mixer layer mask thumbnail to load its selection. Choose Layer-New Adjustment Layer-Hue/Saturation:

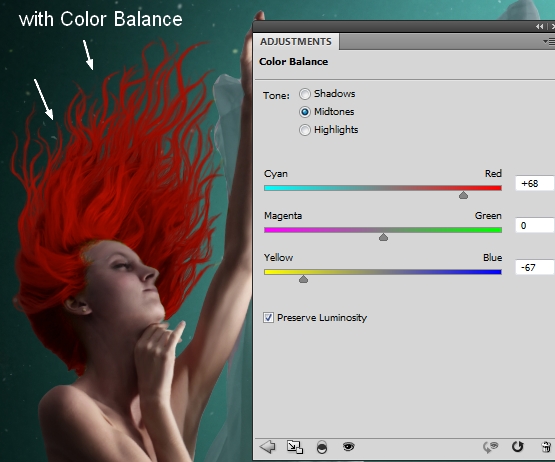
Step 24
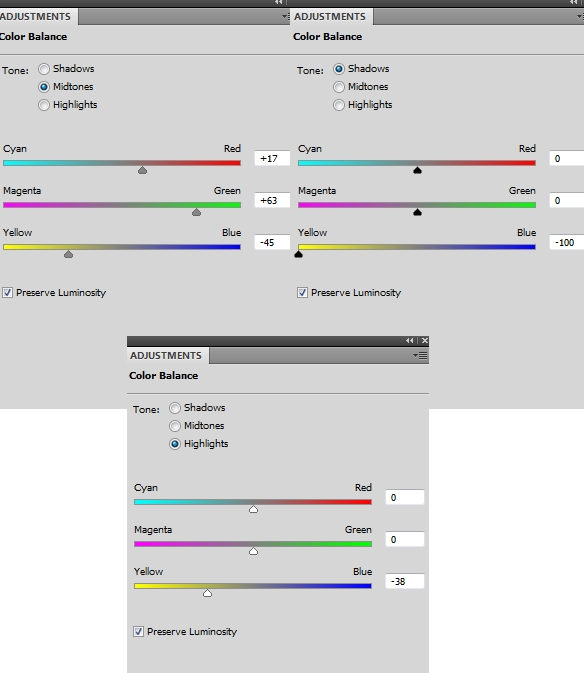
With same method, I used Color Balance to make the hair more vivid:
Step 25
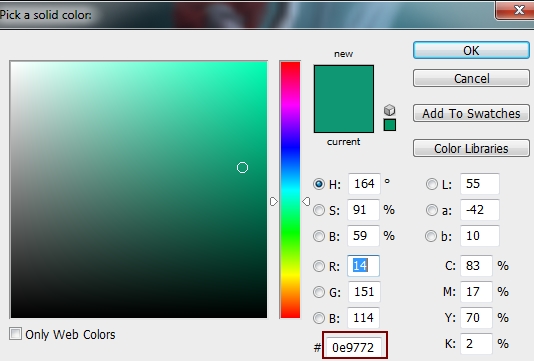
Add a Color Fill layer to model and lower opacity to 10%:
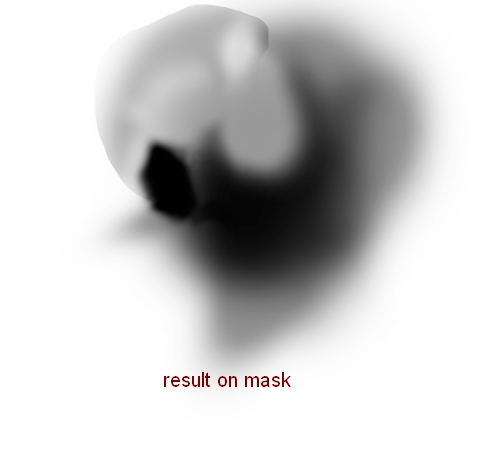
On this fill layer mask use brush to reduce the effect on the hair and some parts of her body:

Step 26
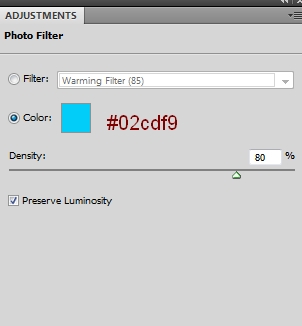
I used Photo Filter to add some cyan/blue to the model:
Apply brush masking on model body and hair:

Step 27
Use a Curves layer to increase the contrast of model a little:
Erase the dark contrast on some parts of model body and flying fabric:
Step 28
I used Levels to brighten the upper part of model body and erase the lower part , also reduce the lightness on some parts of model body and hair ( on this Levels layer mask):

Step 29
I used a layer with same settings in step 21. Use Dodge and Burn to refine light/shadow the hair and fabric:

Step 30
Open branches stock and extract the branches part from background:

Step 31
Use Lasso Tool to choose a branches part and place it at the bottom of our main image:


Copy another parts and arrange them around foreground:
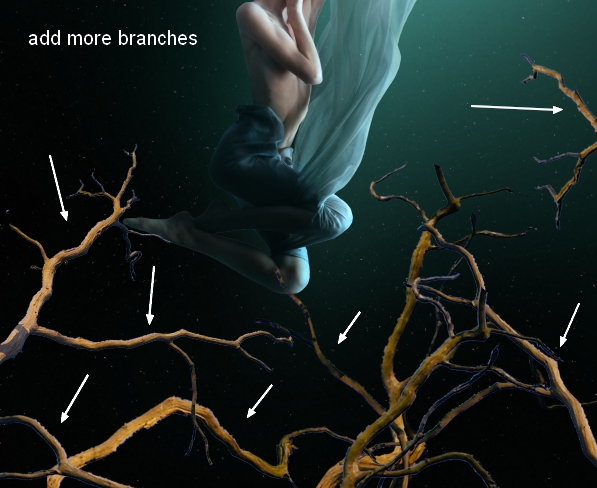
Remember to convert all branches layers to Smart Object.
Step 32
To make depth for the scene, I applied Gassian Blur with 4 px for some branches:
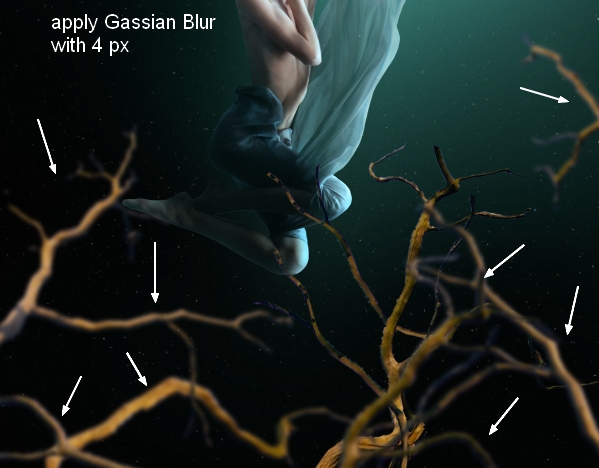
I used brush to erase the top of a branch (on its Filter layer mask):

Step 33
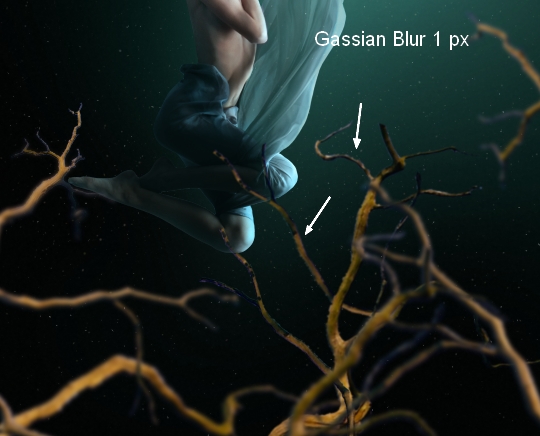
Apply Gassian Blur with 1 px for two other branches:
Step 34
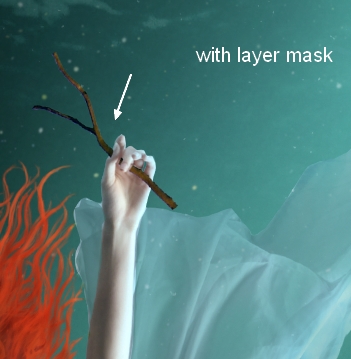
I copied a branches part and put it above the raising hand of the model:

Use layer mask to create a look of model holding that branch:
Step 35
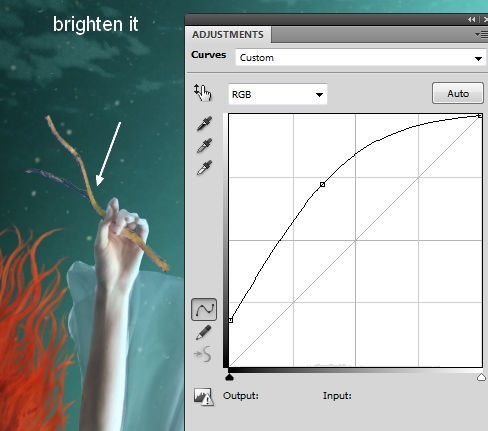
Use Curves to brighten that part:
Step 36
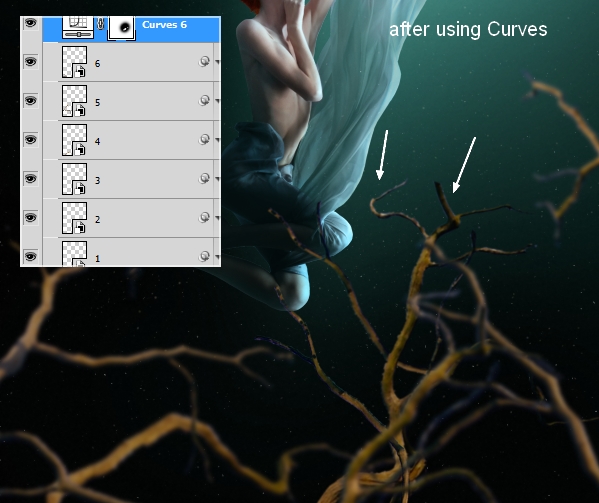
Make all branches layers selected then press Cmd/Ctrl+G to make group for them. Change the mode of this group from Pass Through (default group mode) to Normal 100%. I named them from 1 to 10. I arranged 6 first layers to darken them a little.. On the layer 6, go to Layer-New Adjustment Layer-Curves:

I applied brush masking to reduce dark effect on the top of some branches:
Step 37
On the top of layers of branches group, go to Layer-New Adjustment Layer-Hue/Saturation:


Step 38
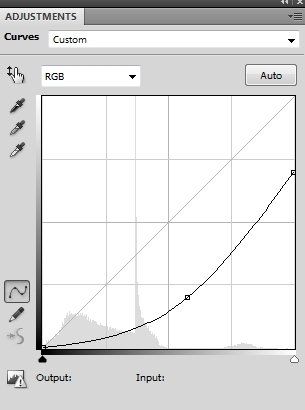
Use another Curves layer on the top to darken all the branches more:
Apply brush masking as usual:

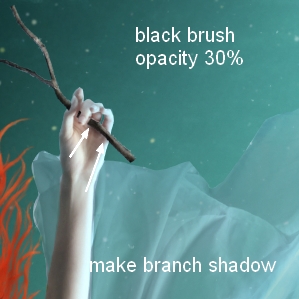
Step 39
Make another on the top (above branches group). Use soft black brush with opacity 30% to paint shadow of the branch on model hand :
Step 40
Cut out the rose and place it at the left part of the branch in model hand:

I used Color Balance to turn the pink into the orange red:

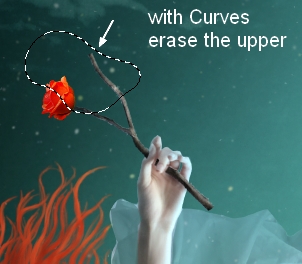
Step 41
Apply Curves for this rose:
On Curves layer mask I erased the upper part of the rose to make it brighter than the lower (as it gets more light):
Step 42
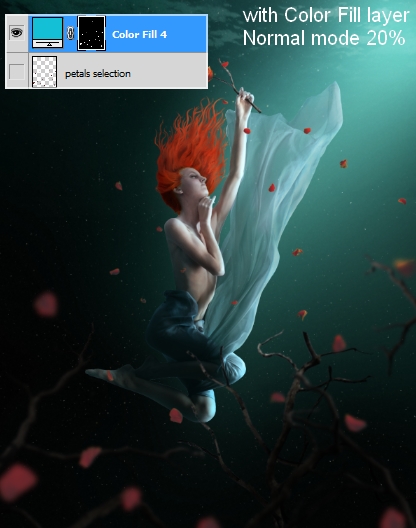
Add a Color Fill layer to the rose and lower opacity of it to 20% to blend it with water background:


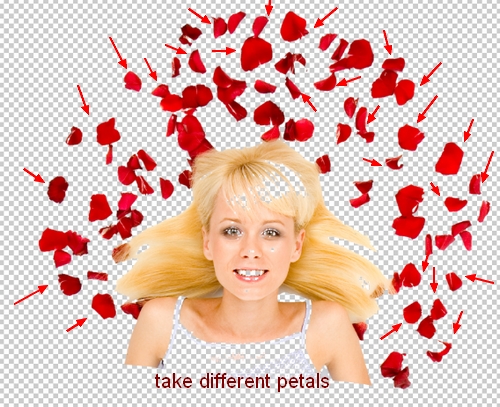
Step 43
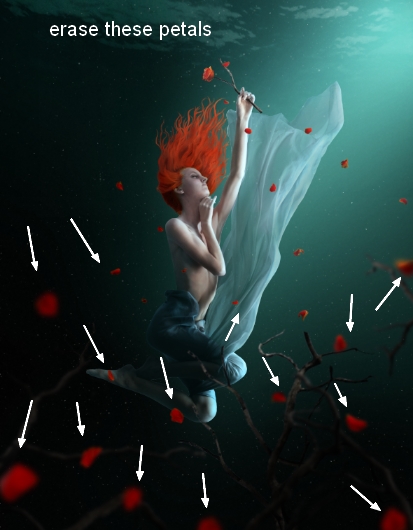
Open stock with rose petals and extract them from background. Choose different petals and arrange them around the model, and at foreground with bigger ones. I applied Gassian Blur with 8 px for bigger petals, 4 px for some others and 0.5 px for the rest:


Step 44
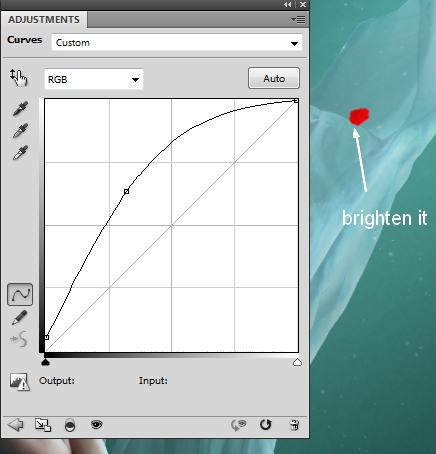
Make group for the petals. I used Curves to brighten one as I found it a bit dark:
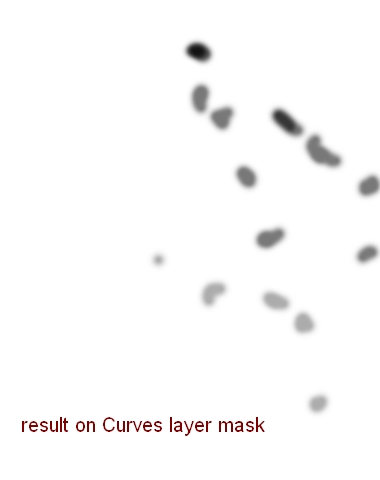
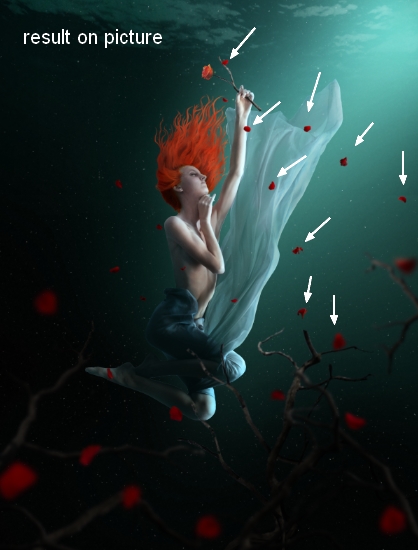
Step 45
Use Curves on the top of the petals layers to darken them:
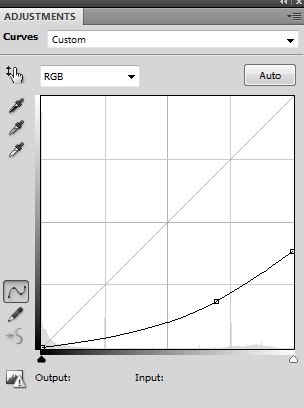
Work on Curves layer mask to define light/shadow on some petals:
Step 46
Add a Color Balance layer to the petals group:


Step 47
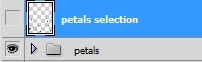
Right click petals group, choose Duplicate Group. Right click duplicated group, choose Merge Group. Now we have selection of the petals that will be useful in next steps (turn it off).
Step 48
Load petals selection, then add a Color Fill layer (as we did with the hair):
Lower opacity of this layer to 20%:
Use soft brush to clear the effect on lower petals:
Step 49
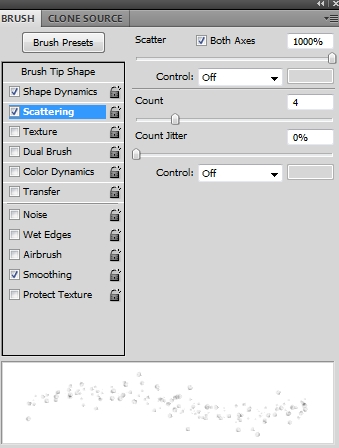
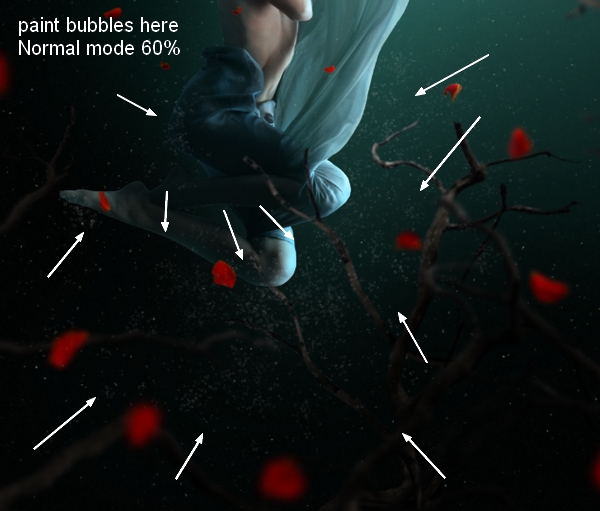
Make a new layer on the top and change foreground to white. Use bubble brush you like, set the size as 5 px and change settings for it as shown below (press F5 to do it):


Paint bubbles under model knee, legs, near the shoulders, arm, hair, fabric, then lower opacity to 60%. Vary brush opacity to get more natural result:

Step 50
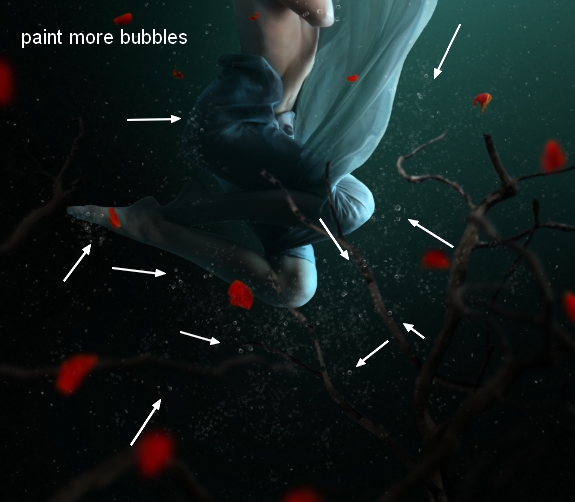
Increase the bubble size to 7 px and continue painting around the parts mentioned in previous step (on a new layer). I made these bubbles stand out by keeping the opacity 100% and brushing randomly:

Step 51
Make a new layer and change brush to light rays. Choose the one you like and paint on the top right of the pic:

Change the mode to Overlay 100% and blur the right side of it with layer mask:
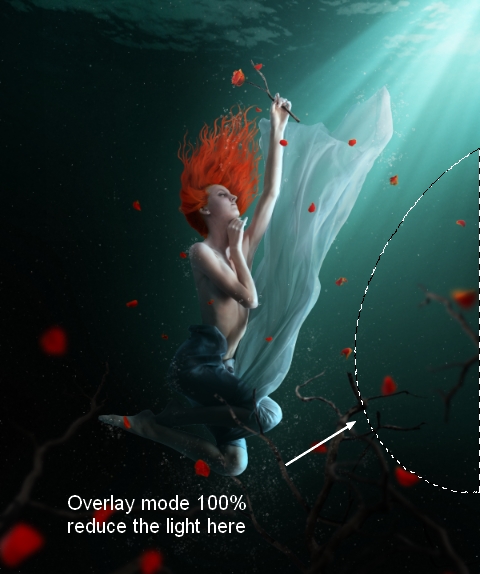
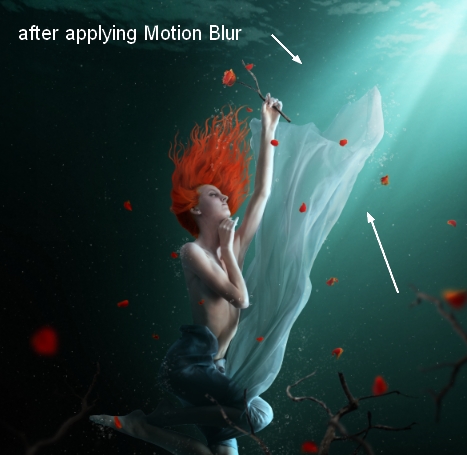
Go to Filter-Blur-Motion Blur:

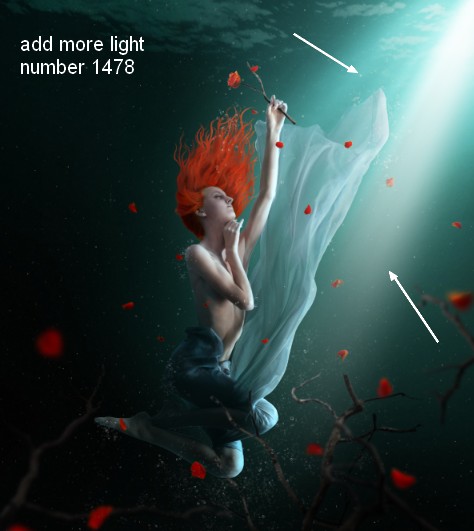
Step 52
Choose another light ray (I chose number 1478) to add more to the top right. I applied Motion Blur with same settings but with Soft Light mode 100%:

Step 53
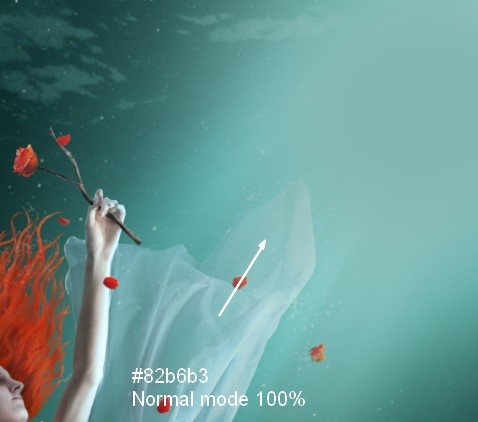
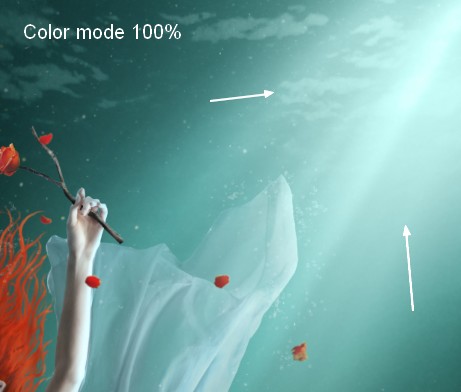
On a new layer I used soft brush with color #82b6b3 to paint on the top of the light to refine color of highlight there. I changed the mode to Color 100%:
Step 54
Add two Color Balance layers to the top:

On the mask of the first layer use brush to reduce the effect on model as shown:
On the mask of the second I applied more brush masking:

Step 55
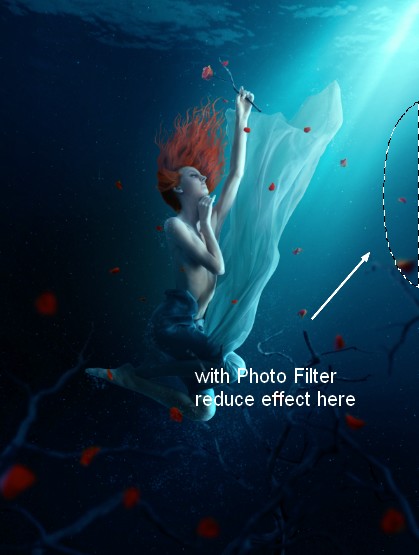
I used Photo Filter to change color of the pic a little:

Reduce opacity of the effect at the right corner of the pic:
Step 56
Add a Gradient Map layer :

Lower opacity of this Gradient Map layer to 20%. Choose layer mask, erase selected parts below:

Step 57
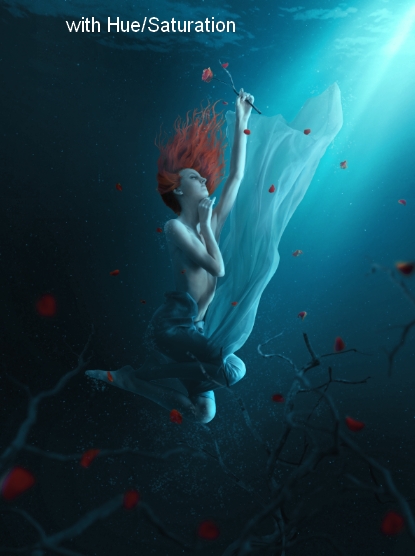
I used Hue/Saturation to enhance the blue on the pic :

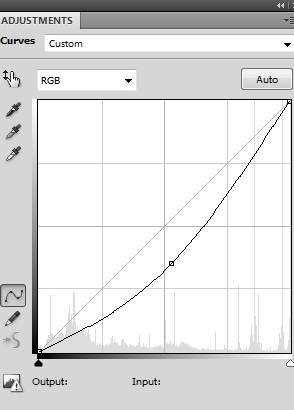
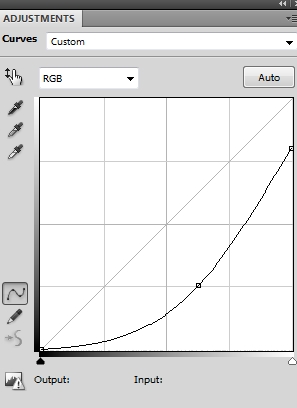
Step 58
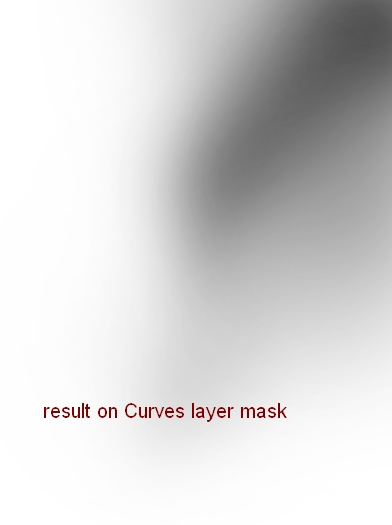
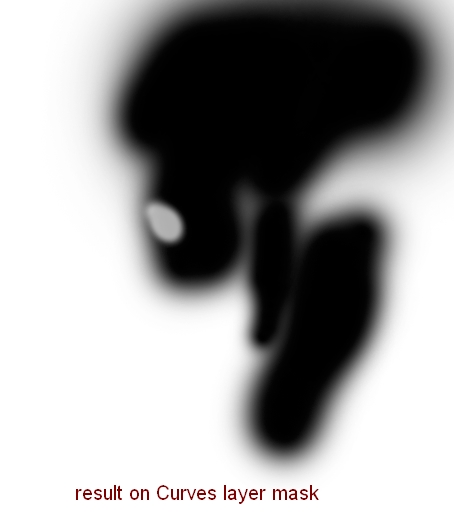
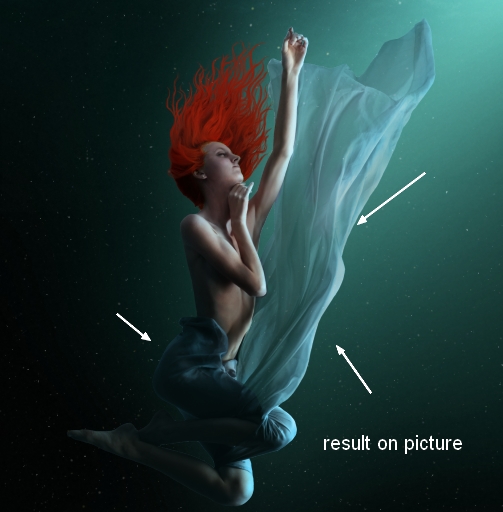
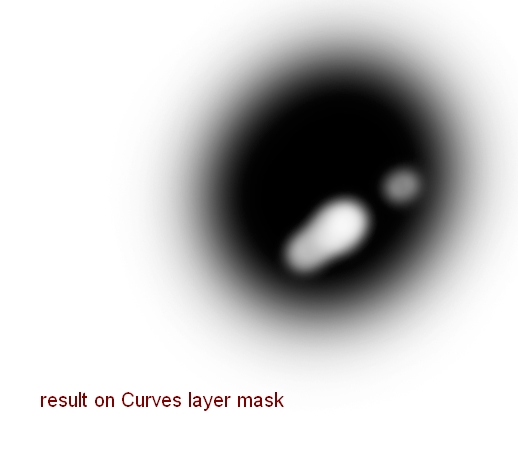
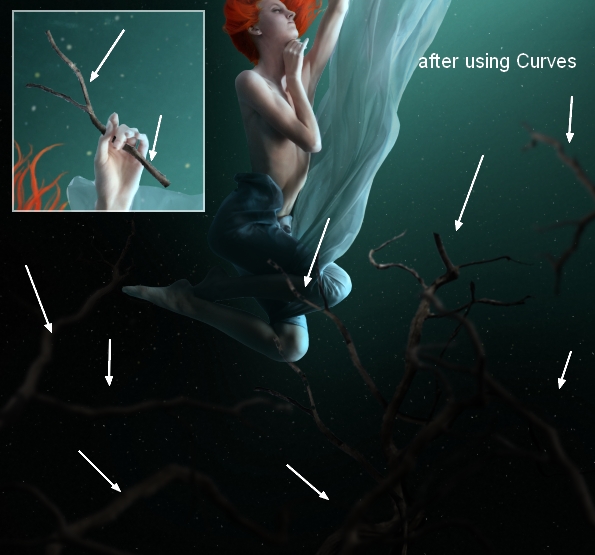
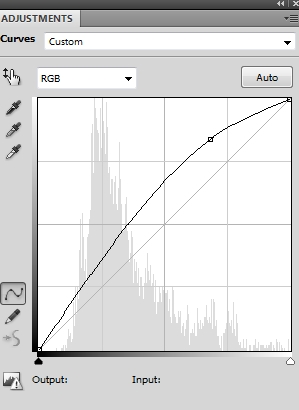
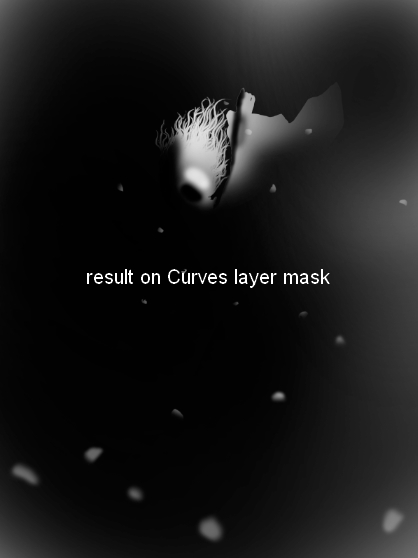
Use Curves to enhance the contrast of the picture:
Here is the result on Curves layer mask:
Step 59
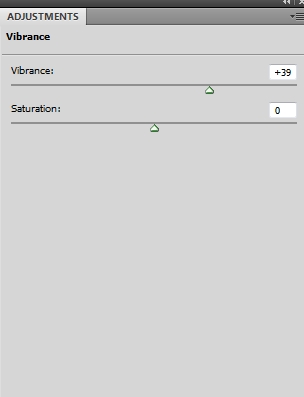
I used Vibrance to complete the color adjustment:
Congratulations, You’re All Done!
Awesome job making it this far! You should be proud of what you’ve created. Show it off to your friends and colleagues and get some feedback.
You can also comment here with your version, or any questions you had about the techniques used. We love to see what you guys create and we’re always here to give helpful feedback and tips to help you to improve.
The source files for this tutorial are available to our FanExtra members community. If you want to access the source files for this tutorial (and all of our tutorials + thousands of other resources) then sign up here.
If you’re already a FanExtra member then you can login here to access the source files.

0 Comments