Hey PSDFANs!
In this tutorial I’ll show you how to create a dark and emotional fallen angel scene using a variety of photo manipulation techniques. You’ll work with blending techniques, adjusting colour, practice retouching, painting and more.
By the end of this lesson you should mastered some practical new skills to improve your digital art!
What You’ll Be Creating:
Here’s a look at the outcome you’ll be able to produce by the end of this lesson:
Step 1
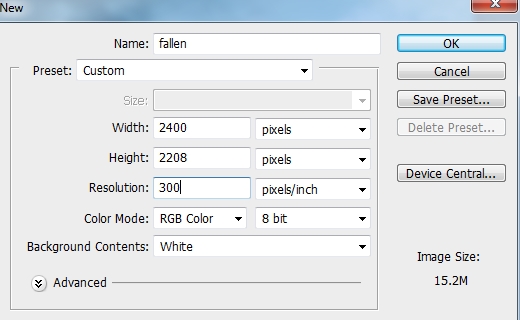
Create a new document in Photoshop with the settings below:
Step 2
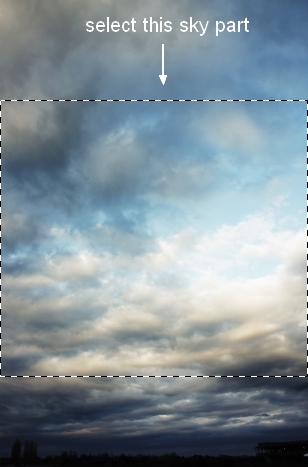
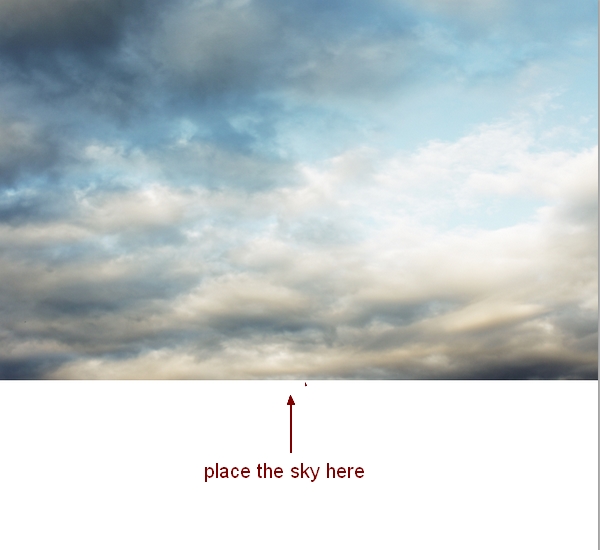
Open the sky image. Use the Retangular Marquee Tool to select a sky part then drag it into our white canvas using the Move Tool (V):
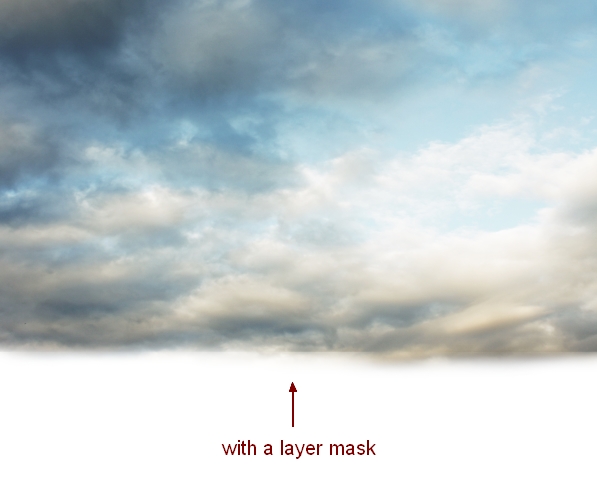
Click the second button at the bottom of the Layers Panel to add a mask to this layer. Use a basic, soft brush with black color to soften the hard edges of this sky part:
Step 3
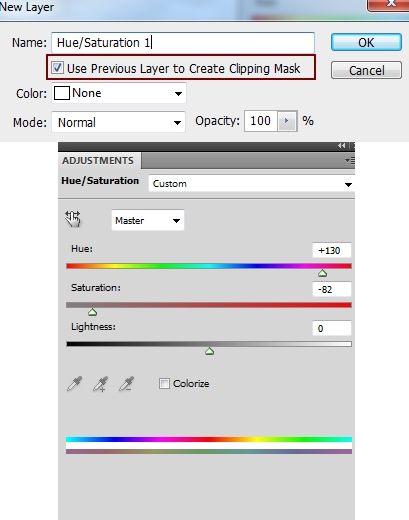
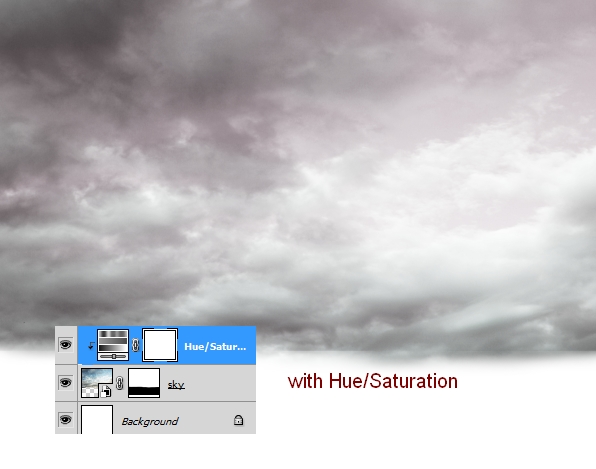
To change the color of the sky, I used an adjustment layer with Clipping Mask. Go to Layer > New Adjustment Layer > Hue/Saturation:
Step 4
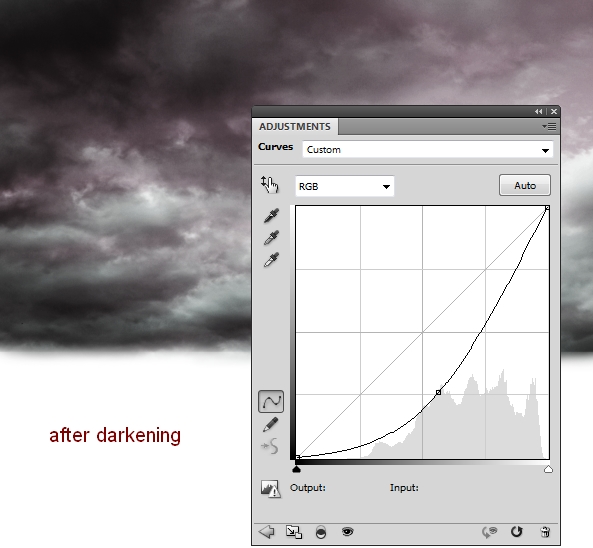
I used a Curves adjustment layer to darken this sky:
Step 5
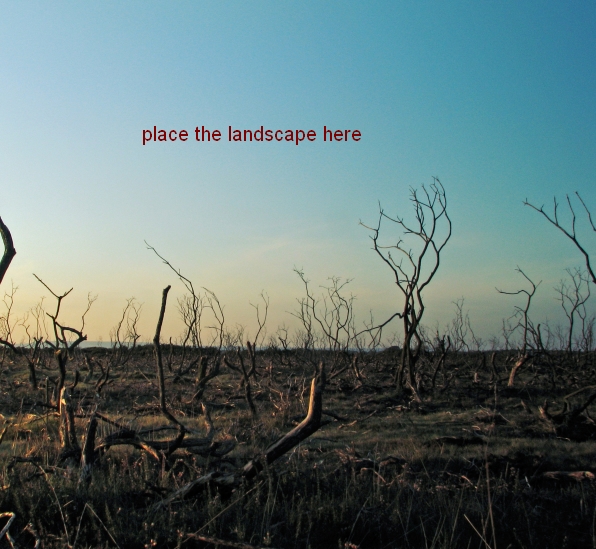
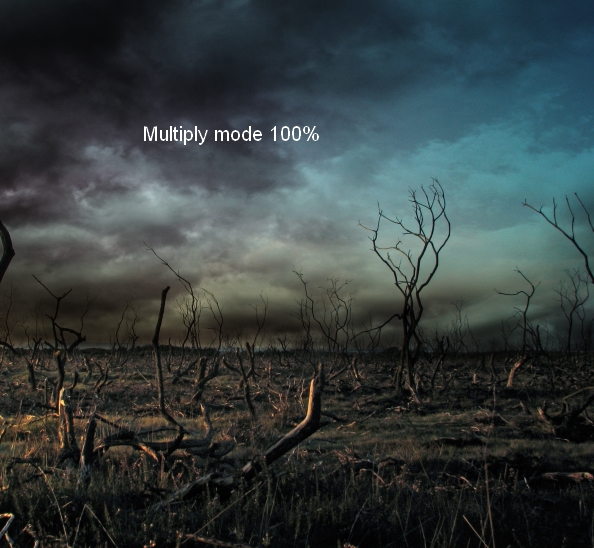
Place the landscape image over the our main document and change its layer mode to Multiply 100%:
Step 6
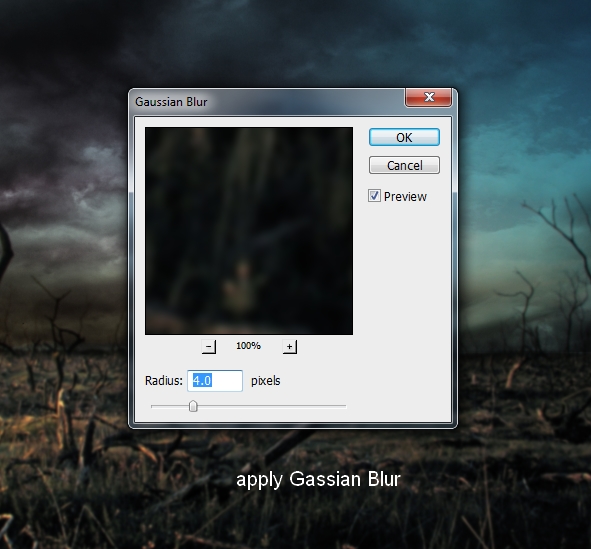
Go to Filter > Blur > Gassian Blur and set the radius to 4 px:
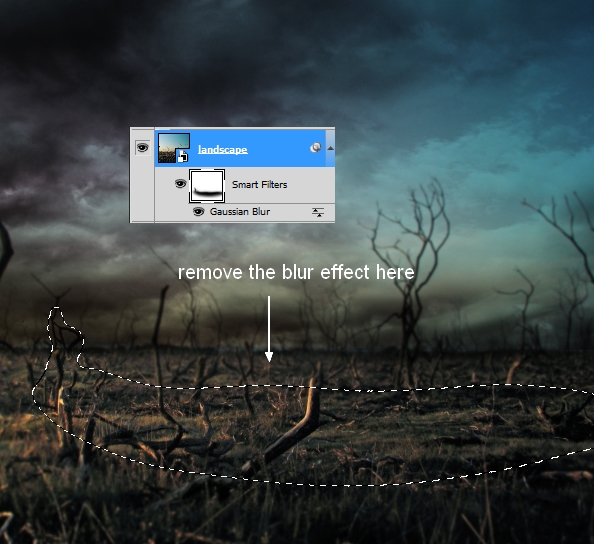
On the Filter Mask use a soft black brush to remove the effect on the midground and create a depth to the scene:
Step 7
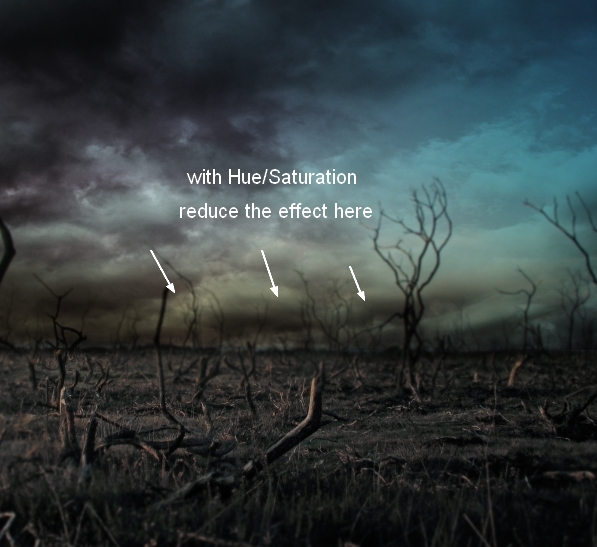
To reduce the sunlight on the landscape I used Hue/Saturation (Clipping Mask):
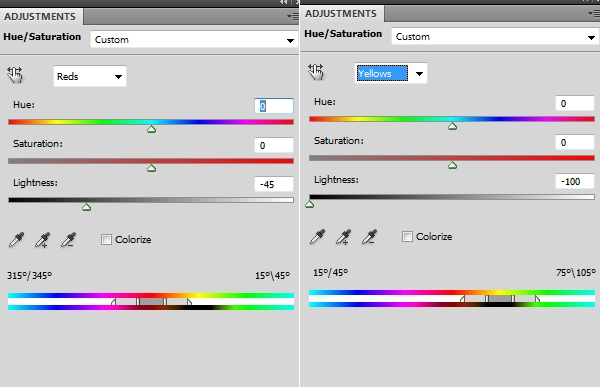
On this layer mask use a soft black brush to reduce the effect at the left edge of the sky :
Step 8
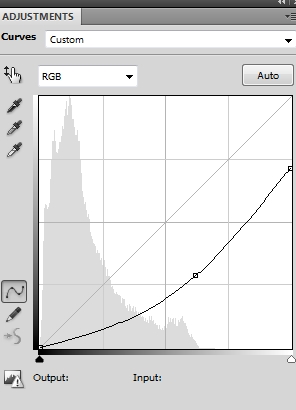
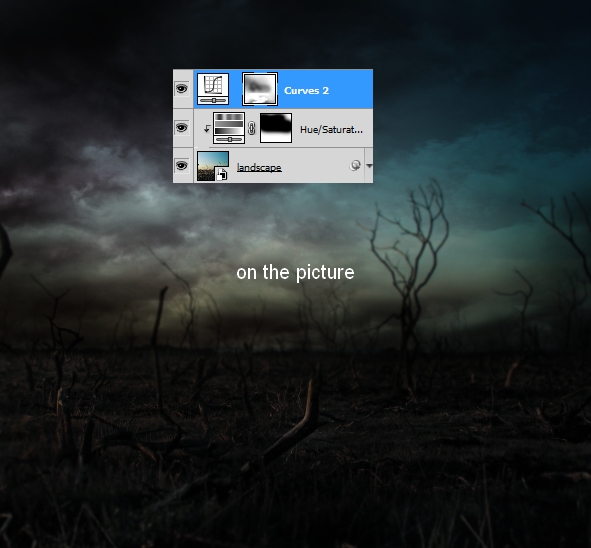
To darken the whole scene I created a Curves adjustment layer on the top:
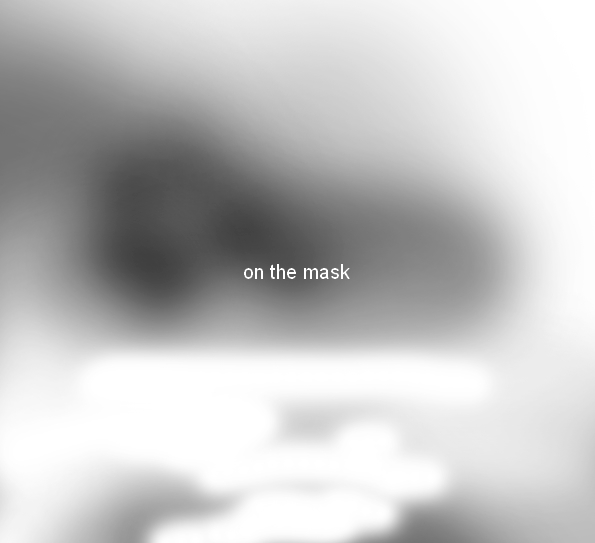
On this layer mask use a soft black brush with the opacity from 10 to 30% to decrease the dark effect on some parts of the sky and ground:
Step 9
I used a Color Fill layer to reduce the dark contrast of the horizon area. Go to Layer > New Fill Layer > Solid Color:
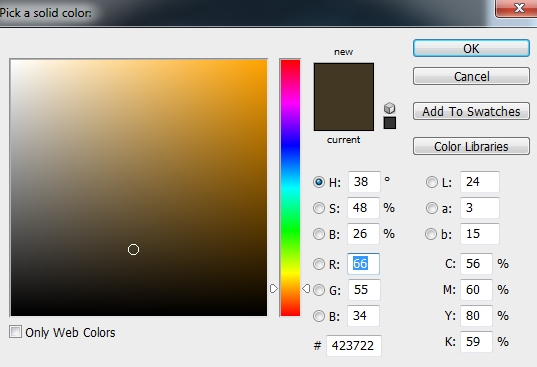
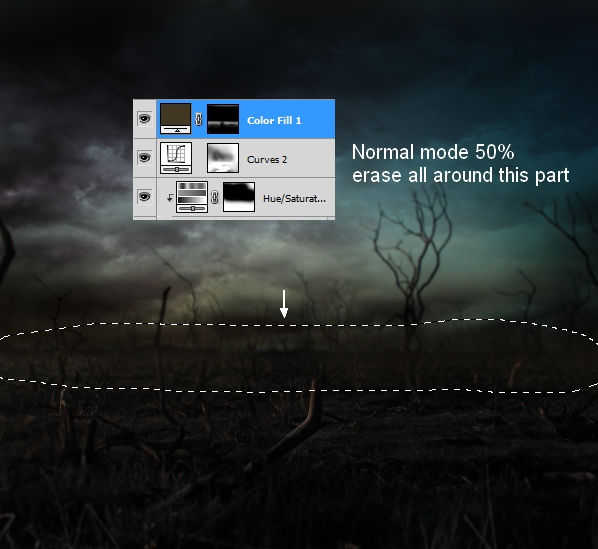
Lower the opacity of this layer to 50%, and use a soft black brush to clear the effect around the horizon:
Step 10
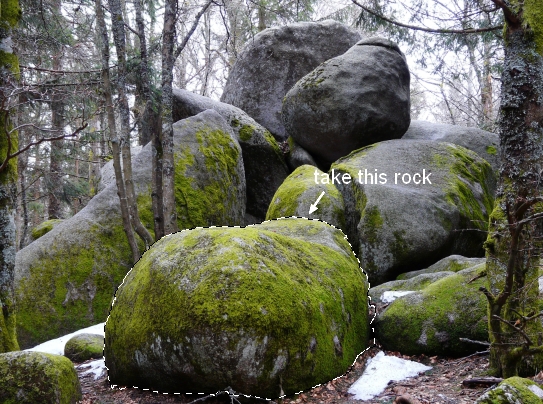
Open the rock image. Take this one and place it near the foreground:
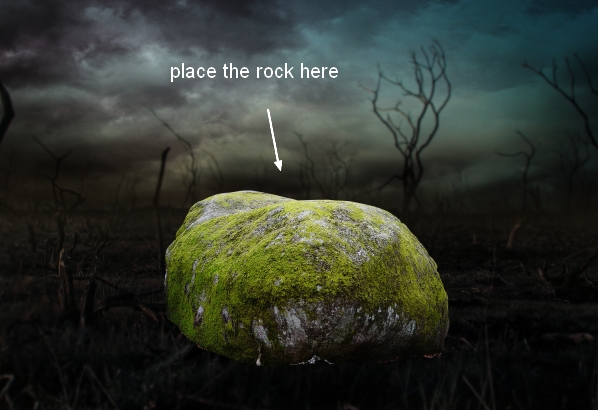
Add a mask to this layer. Use a soft black brush to blend the rock bottom with the ground:
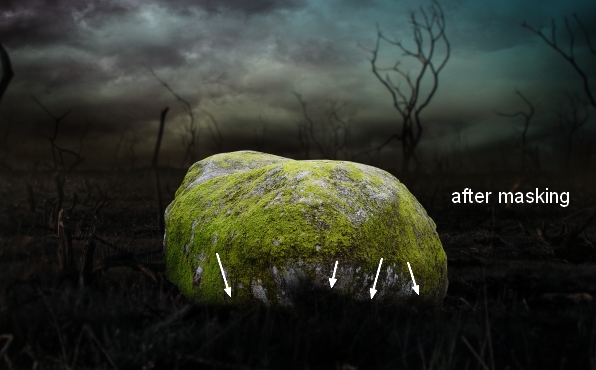
Step 11
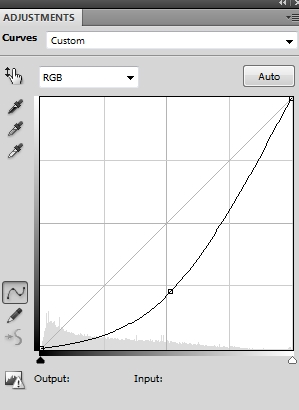
I used a Curves adjustment layer to darken the rock:
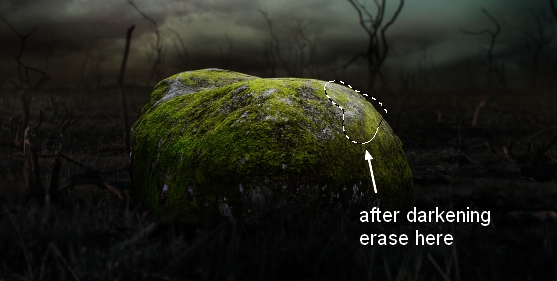
On its layer mask use a soft black brush to reduce the dark on the right side of the rock:
Step 12
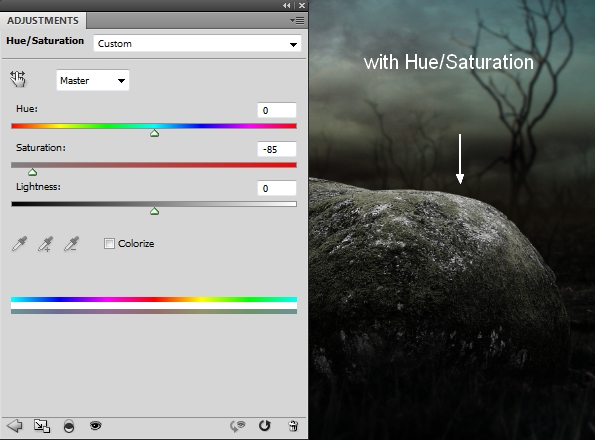
I used Hue/Saturation to reduce the rock saturation:
Step 13
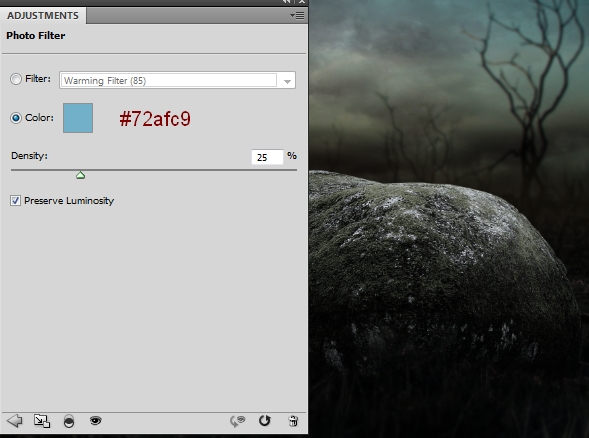
I added a Photo Filter adjustment layer to change the color of the rock a little:
Step 14
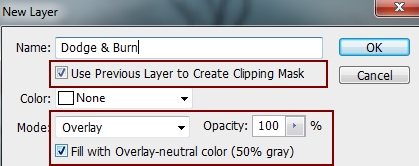
Make a new layer on the top, change the mode to Overlay 100% and fill with 50% gray:
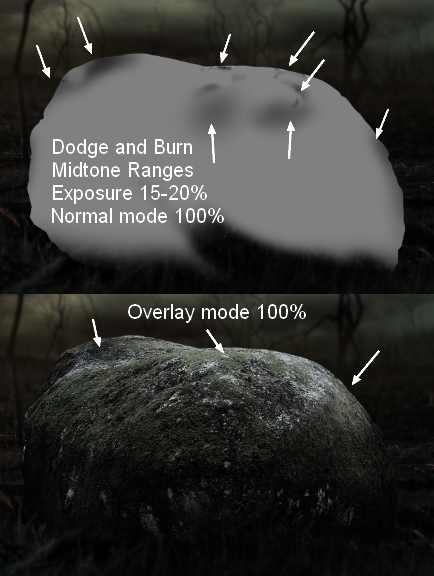
Take the Dodge and Burn Tool (O) with Midtones Range, Exposure about 15-20% to refine the light on the rock. You can see how I did it with Normal mode and the result with Overlay mode:
Step 15
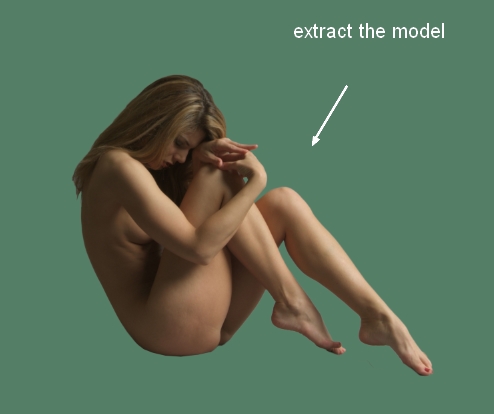
Extract the model from the background:
Step 16
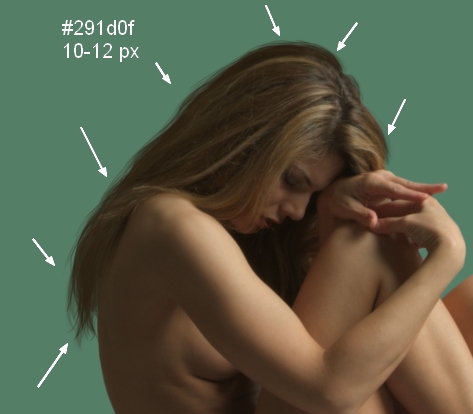
In this step we’ll add more hair to the model using a tablet pen (you can use hair brushes instead). Make a new layer, use a hard brush with the color #291d0f and the size about 10-12 px to paint more hair from the head top to the back:
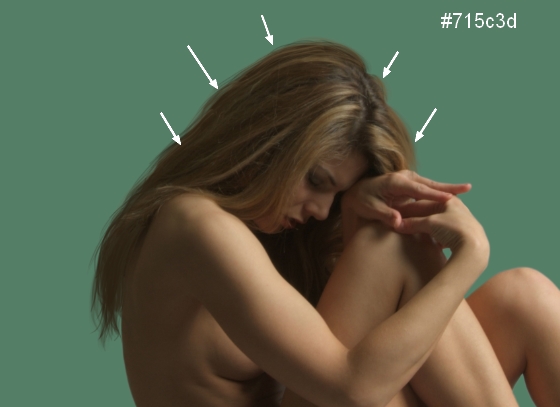
Create another layer and change the brush color to #715c3d. Paint some lighter hair strands :
Step 17
Hide the background and the fill layers (under the model one) and hit Cmd/Ctrl+Option/Alt+Shift+E to merge all transparent layers (the extracted model and hair ones). Place the merged layer above the rock:
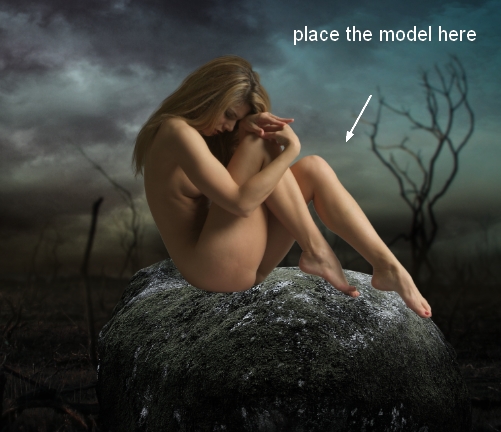
Create a new layer under the model one. Use a soft black brush to paint the shadow under the feet and the body (look at the original photo to see how the shadow formed).

Step 18
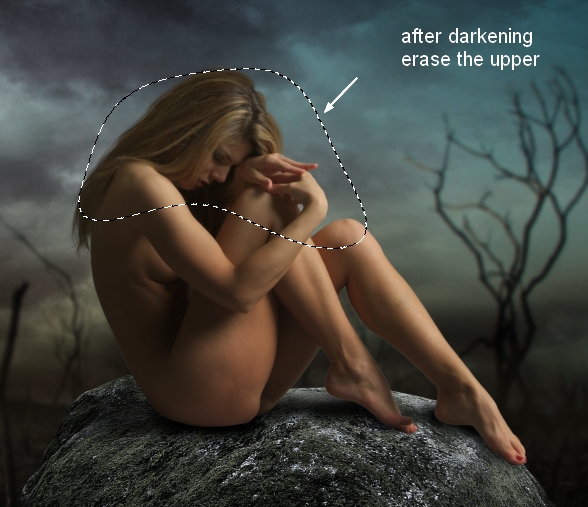
I used Curves to darken the model:
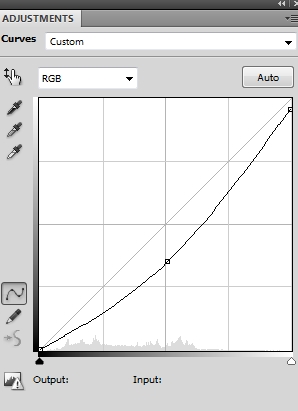
On this layer mask use a soft black brush to erase the upper part of the model as I don’t want it to be affected by this adjustment layer:
Step 19
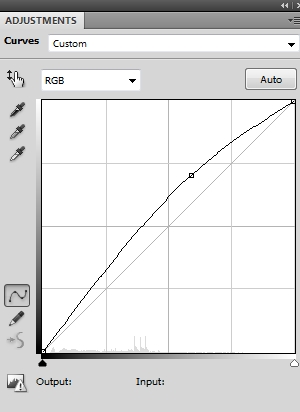
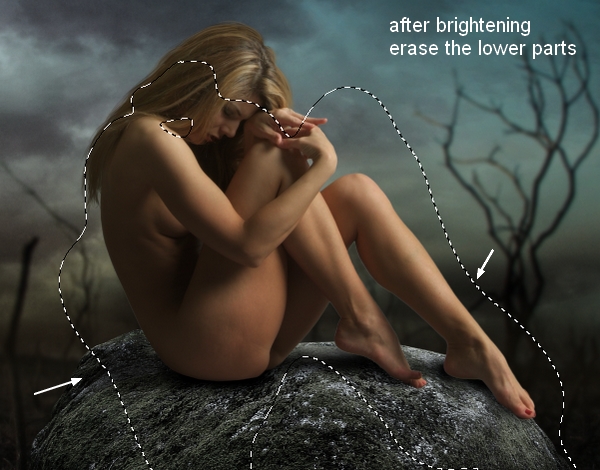
I used another Curves adjustment layer to brighten the upper part a little:
Apply brush masking on the lower parts:
Step 20
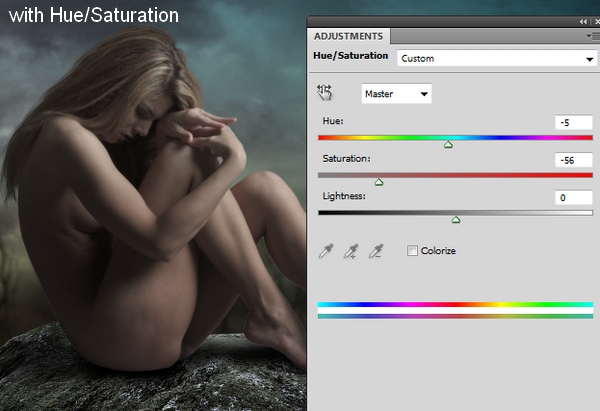
I used Hue/Saturation to decrease the saturation on the model:
Step 21
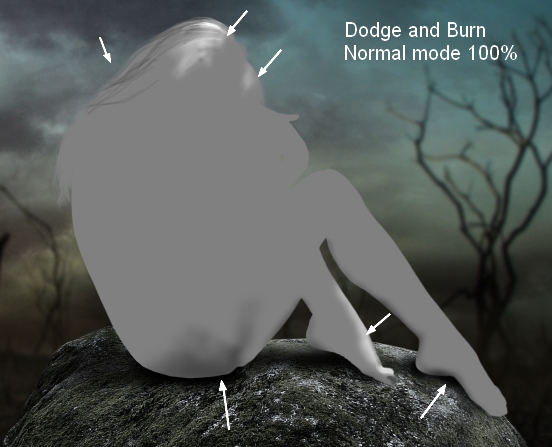
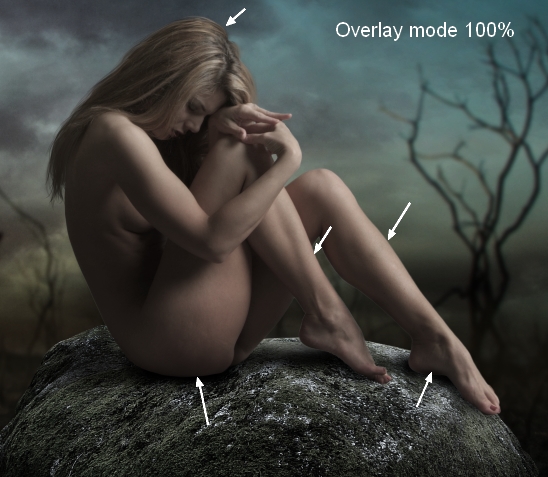
Create a new layer with the same settings in the step 14. Use the Dodge and Burn tool to refine the light and shade of the model:
Step 22
Open the wings image and drag them onto the model back:
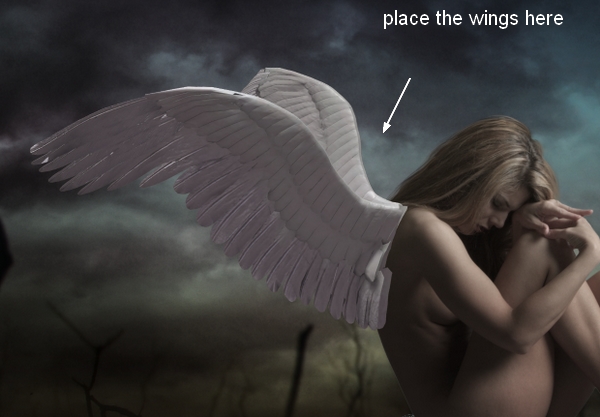
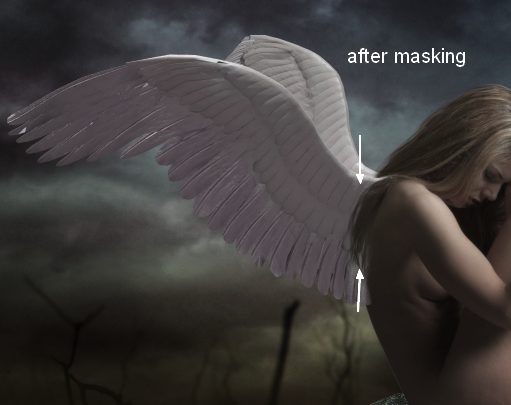
Add a mask to the wings layer. Use a tablet pen to work on the mask to reveal some hair on the model back as shown below:
Step 23
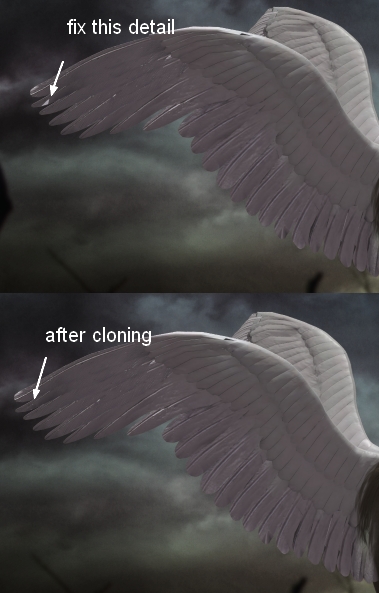
Make a new layer on the top. Active the Clone Tool and remove an unwanted detail on the wings:
Step 24
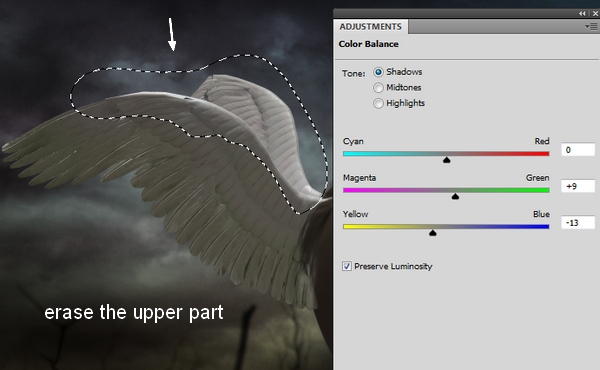
I used Color Balance to change the wings color. On this layer mask erase the upper part of the wings with a soft black brush:
Step 25
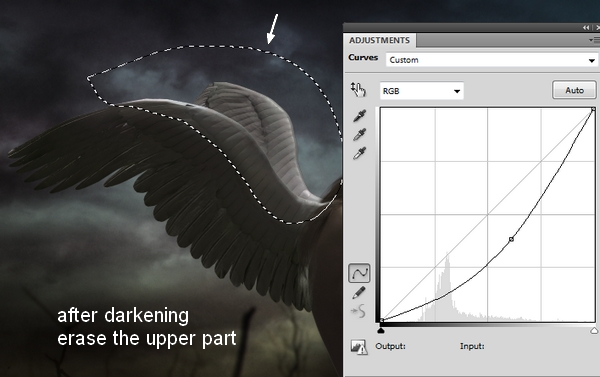
I used Curves to darken the wings and apply brush masking on their upper part:
Step 26
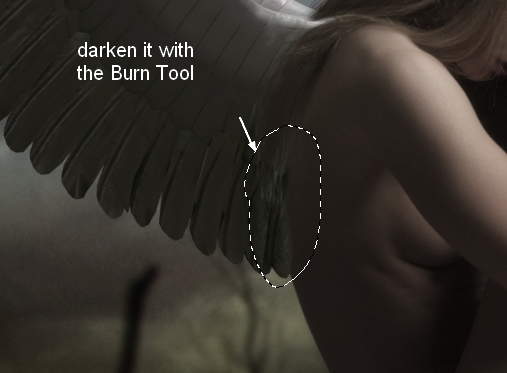
I used the Burn Tool on a new layer to darken the intersection of the model back and wings:
Step 27
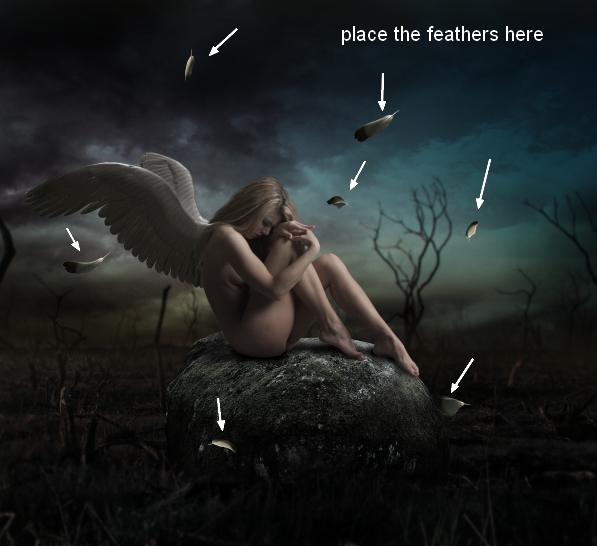
Take the feathers and arrange some around the model, use the transform tools to tweak them if needed.
Step 28
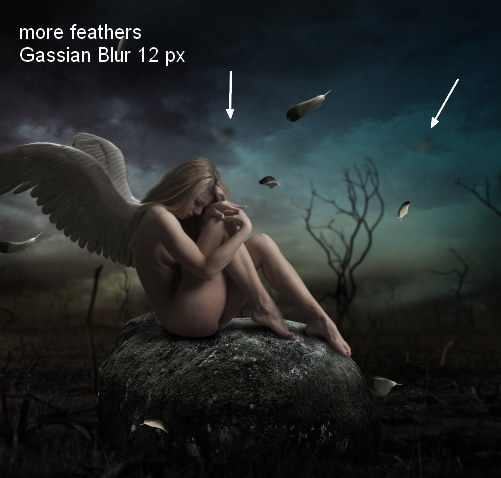
Add more feathers to the background and apply Gassian Blur with 12 px to them:
Step 29
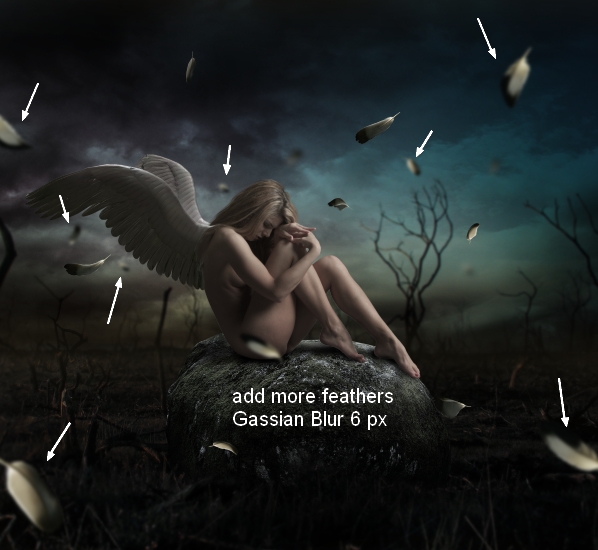
Arrange many more feathers over the picture, place the bigger ones at the edges. Apply Gassian Blur with 6 px to them:
Step 30
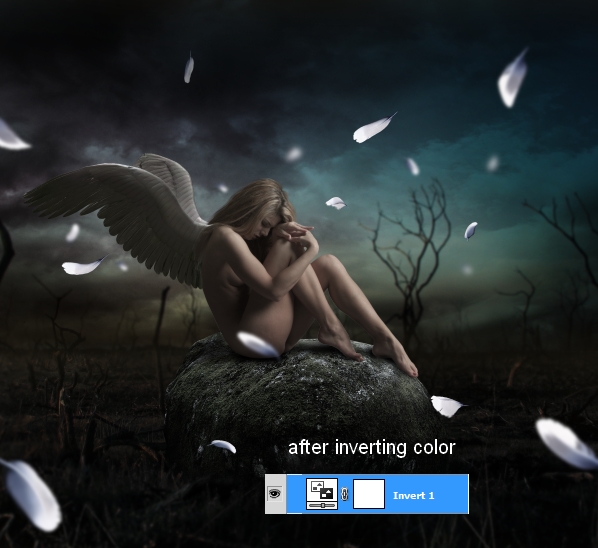
Selected all the feather layers and press Cmd/Ctrl+G to make a group for them. Change the mode of this group from Pass Through (default group mode) to Normal 100%. Make an Invert adjustment layer on the top of the layers within this group to invert the feathers color:
Step 31
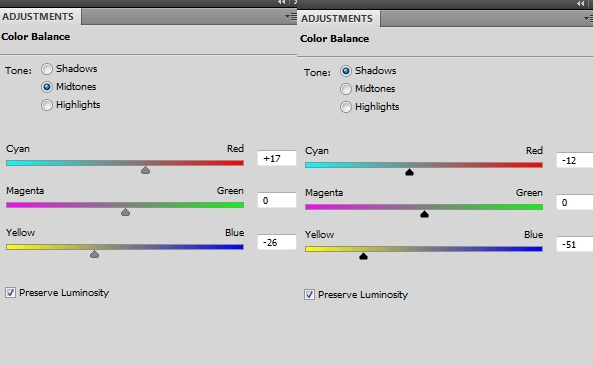
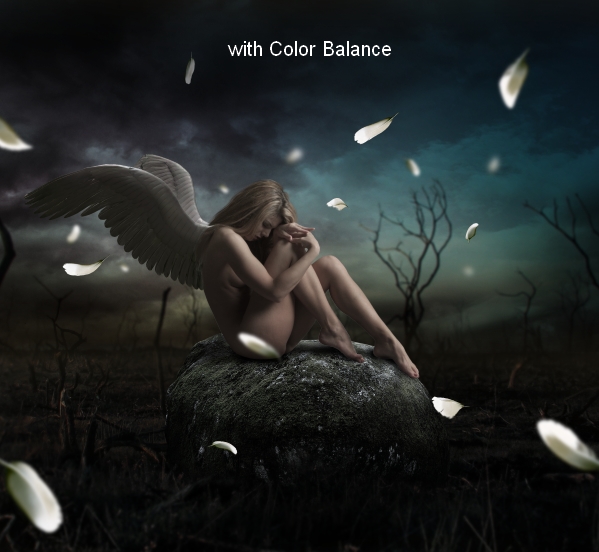
Use Color Balance to change the feathers color:
Step 32
I used Curves to darken the feathers:
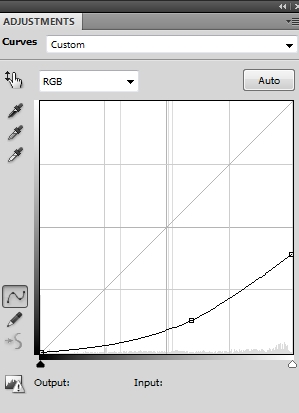
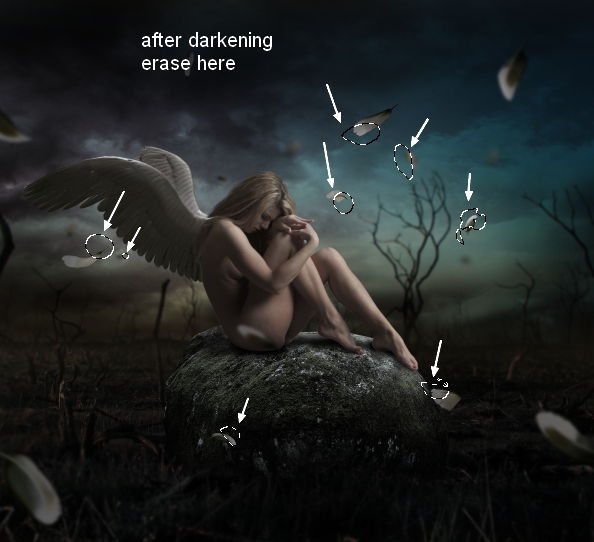
On this layer mask use a soft black brush to remove the dark effect on the feathers at the middle section where is illuminated by the light:
Step 33
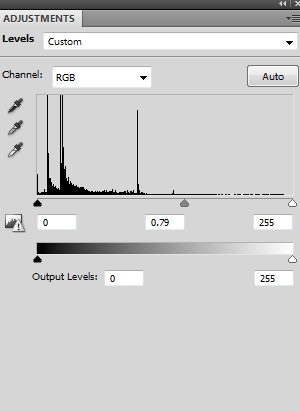
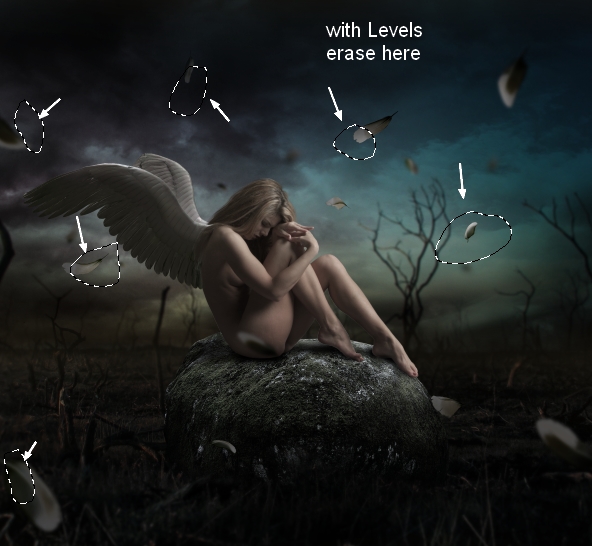
I used Levels to darken the feathers more and apply brush masking on the following parts:
Step 34
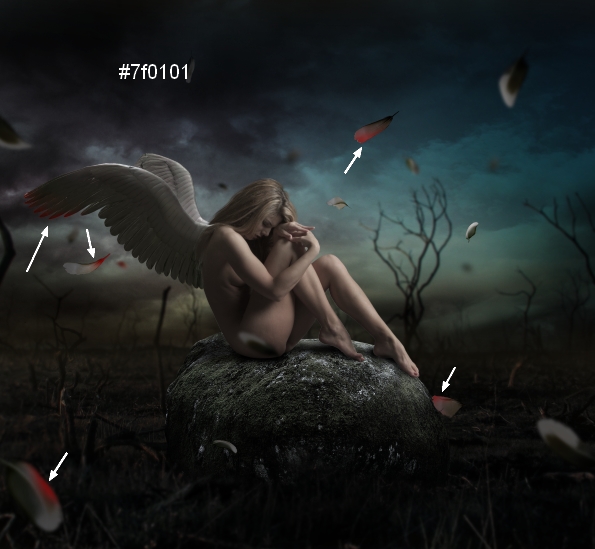
Create a new layer on the top. Use a soft brush with the color #7f0101 to paint on some of the feathers and the wings to make a bloody effect there.
Step 35
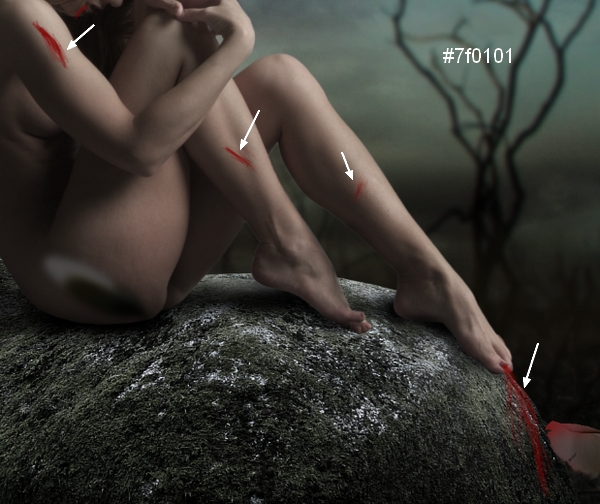
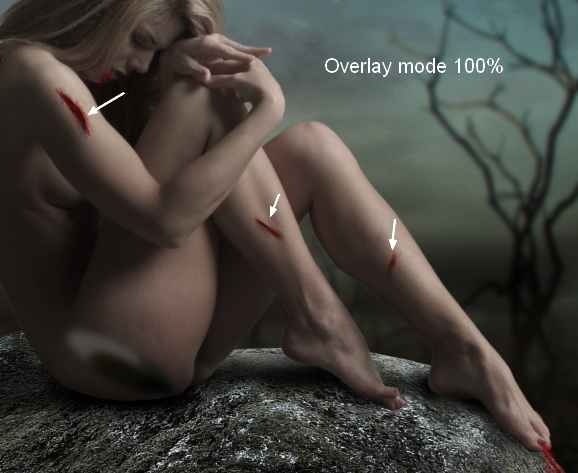
Make a new layer and use the same brush to paint the wounds on the model arm and legs, beside the lips corner and blood on the rock. I highly recommend you to use a tablet pen in this case:
Step 36
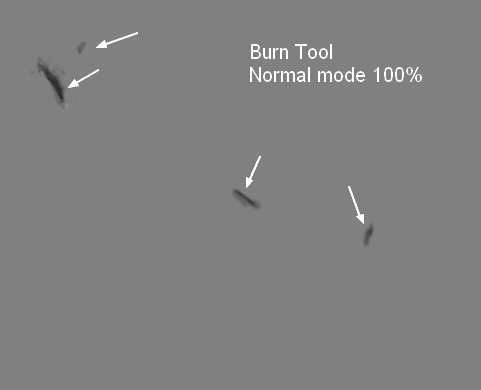
Make a new layer, use the Burn Tool to make the wounds look more realistic:
Step 37
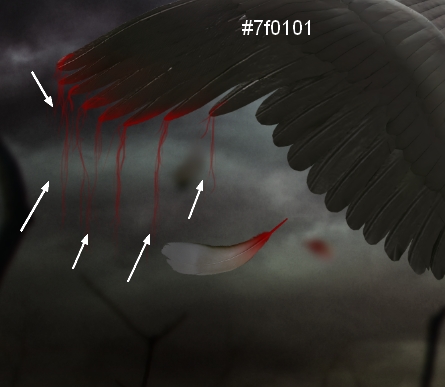
I use the same brush on a new layer to paint some bloody lines falling from the wings:
Step 38
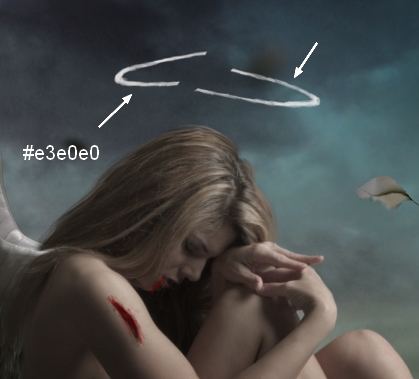
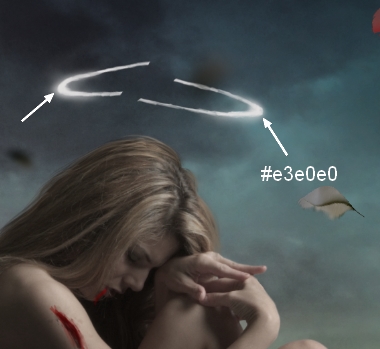
Create a new layer on the top. Use a hard brush with the color #e3e0e0 to paint a broken circle above the model head:
Step 39
On a new layer, use a soft brush with the same color, lower the opacity to 20-30% to paint a glowing effect at the edges of this circle:
Step 40
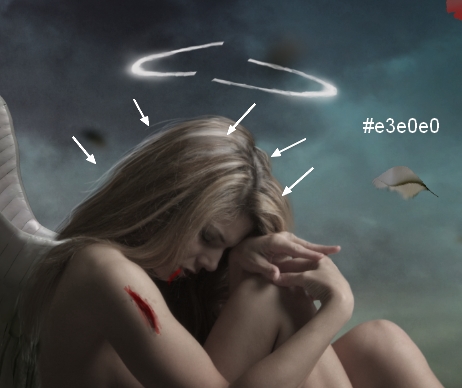
Create a new layer and use a hard brush with the same color to paint some light hair strands on the head top where is affected by the glowing light from the circle:
Step 41
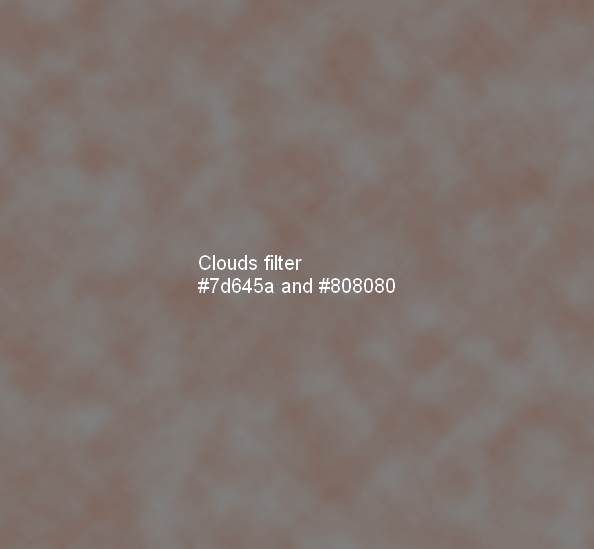
Make a new layer on the top of all layers. Change the foreground and background color to #7d645a and #808080. Go to Filter > Render > Clouds:
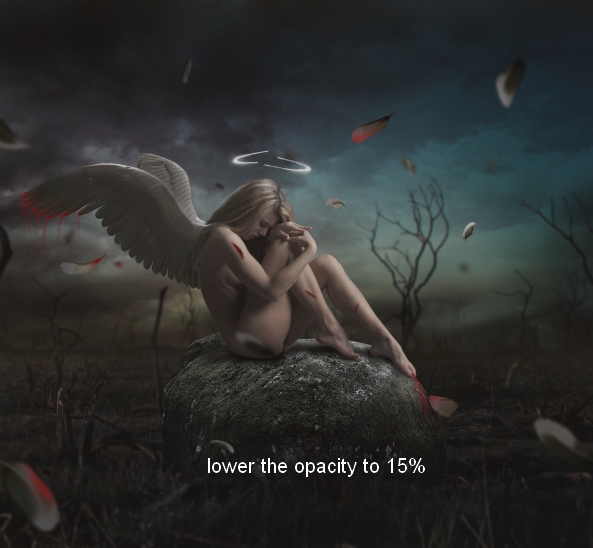
Lower the opacity of this layer to 15%.
Step 42
It’s time for coloring the picture. Make a Gradient Map adjustment layer on the top:
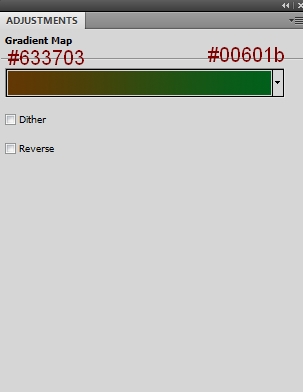
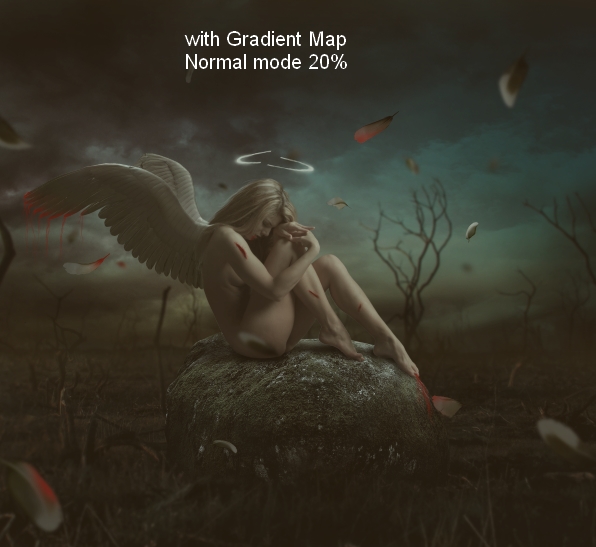
Lower this layer opacity to 20%:
Step 43
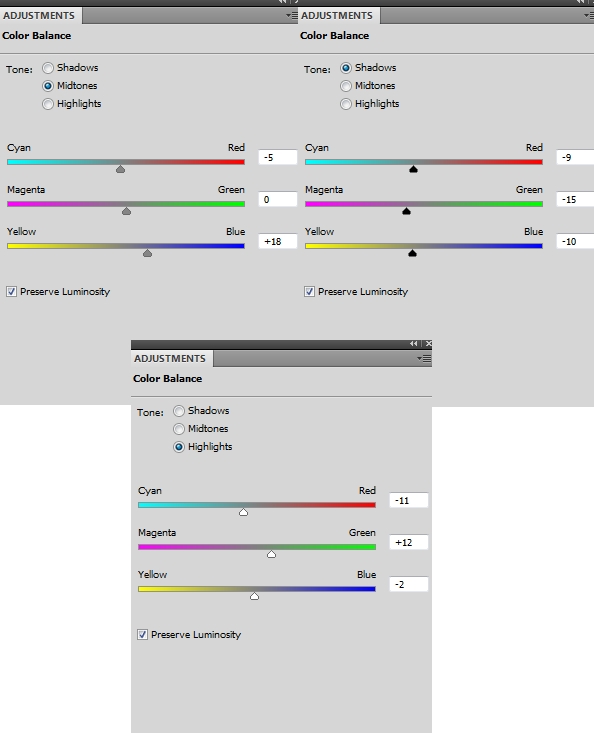
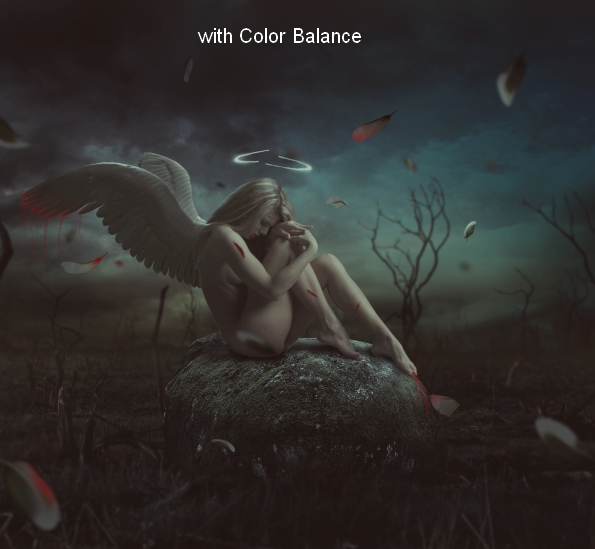
I used Color Balance to add some cold tone to the picture:
Step 44
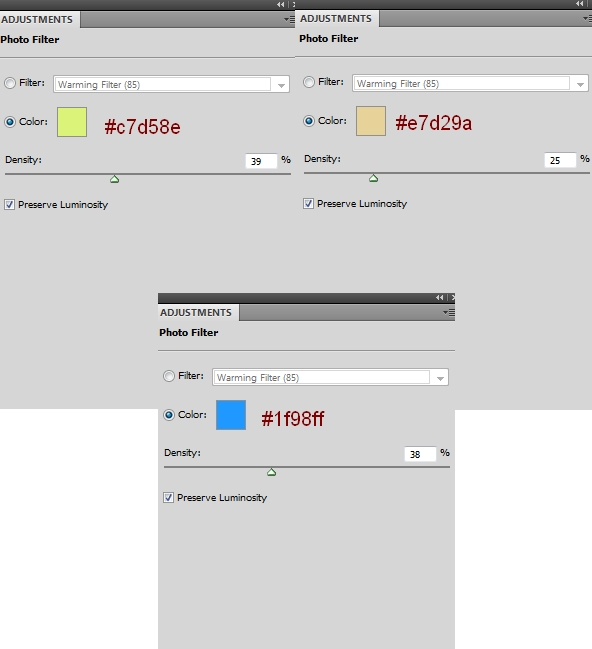
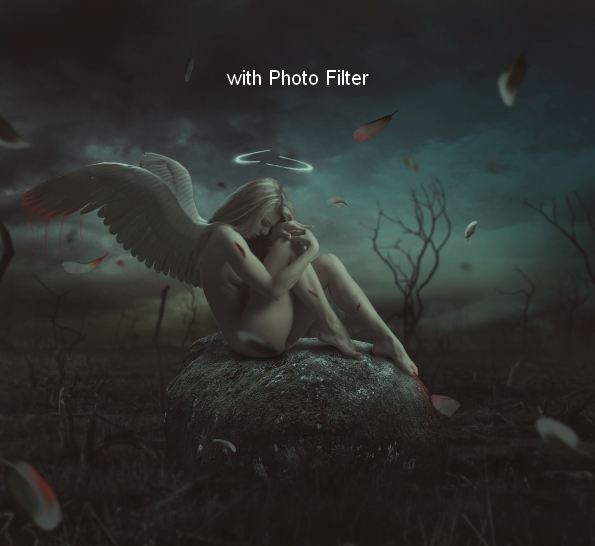
I made three Photo Filter adjustment layers on the top:
Step 45
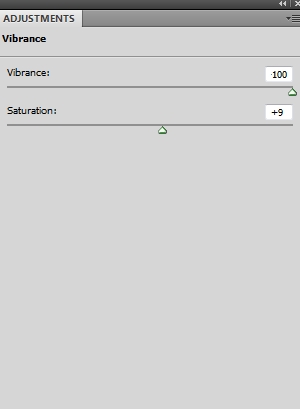
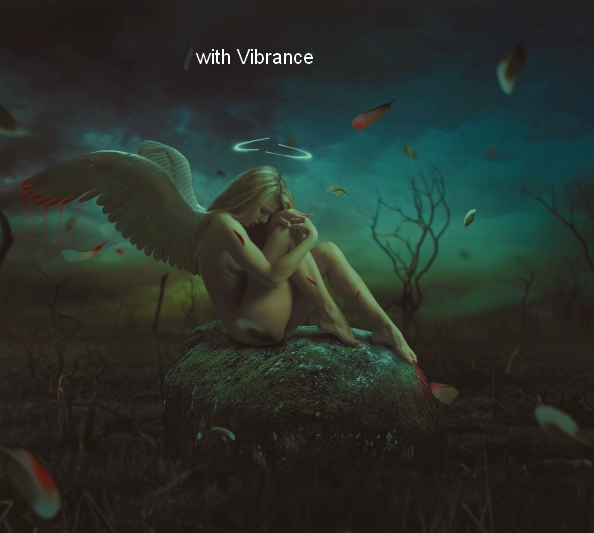
Create a Vibrance adjustment layer to boost the color:
Step 46
I used Levels to brighten the upper part of the scene a little:
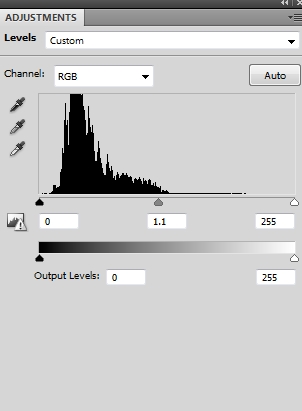
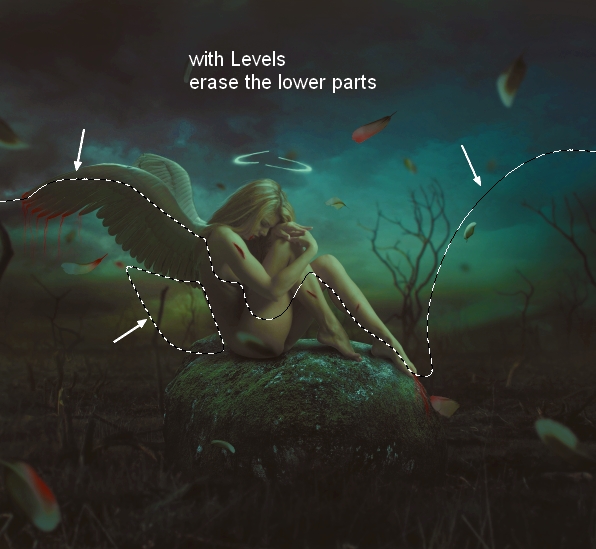
On this layer mask use a soft black brush to erase the lower part of the picture:
Congratulations, You’re All Done!
Awesome job making it this far! You should be proud of what you’ve created. Show it off to your friends and colleagues and get some feedback.
You can also comment here with your version, or any questions you had about the techniques used. We love to see what you guys create and we’re always here to give helpful feedback and tips to help you to improve.
The source files for this tutorial are available to our FanExtra members community. If you want to access the source files for this tutorial (and all of our tutorials + thousands of other resources) then sign up here.
If you’re already a FanExtra member then you can login here to access the source files.

0 Comments