No matter how long you have been a Photoshop user, there are always new tips and tricks to learn! I recently came across a new technique that has transformed the way I work. This method doesn’t use any new tools, in fact I’m pretty sure the feature has been a part of Photoshop for over a decade, yet I only discovered it recently. The feature is an Advanced Blending option within the Layer Styles window named ‘Knockout’. As its name suggests, it ‘knocks-out’ the contents of a particular layer from the layers below. Read on to find out how this feature works, and how I now use it as a replacement to Layer Masks or Clipping Masks in some design scenarios.
This document structure provides a great example of how the Knockout feature works. You have a background photograph, a solid colour banner, then a text element on top. The goal is to ‘punch-out’ the text from the banner to allow the background photo to show through.
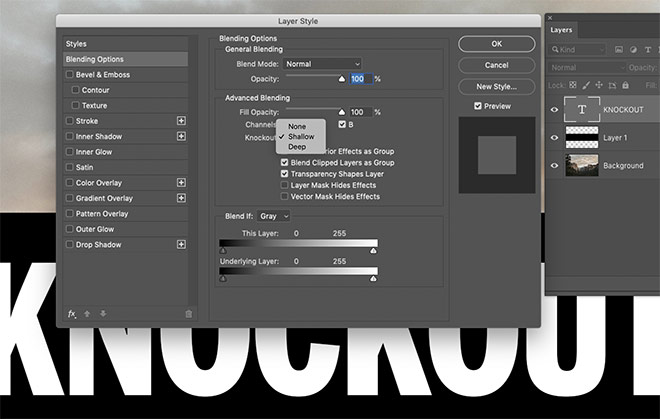
Double-click the text layer to open the Layer Style window. In the main Blending Options settings, you will see the menu for Knockout, with three options of None, Shallow, and Deep. Choose Shallow for now.
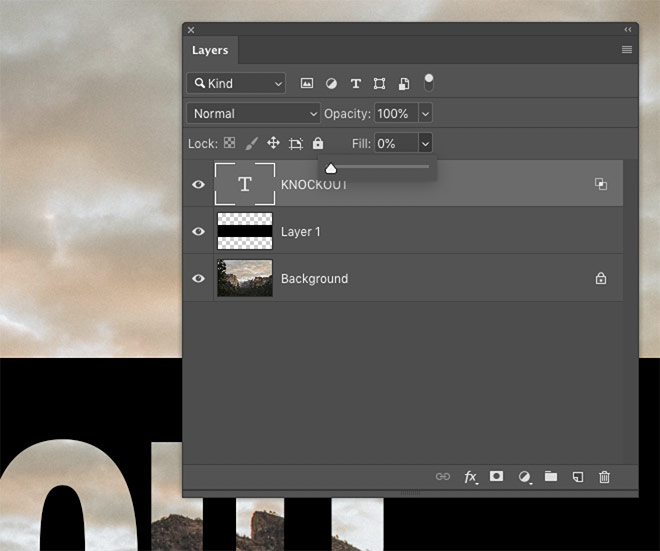
The knockout effect won’t be visible until the contents of the layer are hidden. This can be done by changing to a blending mode that renders the pixels invisible (ie. Multiply for white text), or by simply reducing the Fill to 0%.
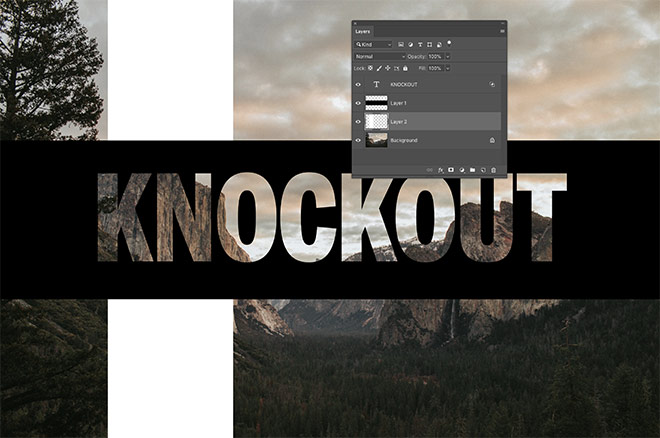
The outline of the text is now ‘knocked out’ of not only the black banner directly underneath, but also any other layers until it reaches the Background layer.
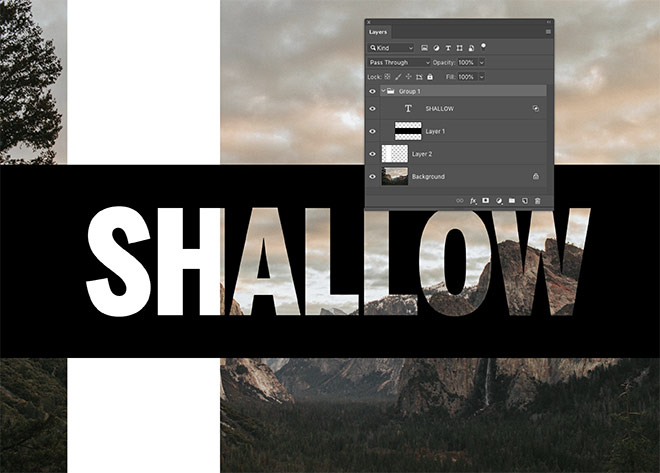
The difference between the Shallow and Deep Knockout options is when contained within a Group, the Shallow option will only knock-out any layers within the same group, whereas Deep will knock-out all layers regardless of layer grouping.
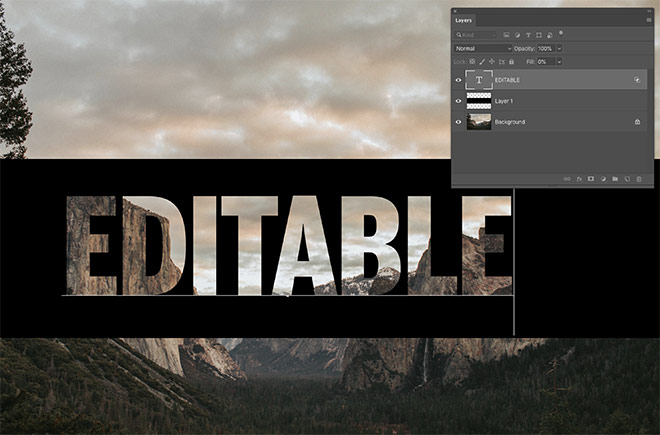
One huge benefit to this knockout method when used with text is the effect is automatically updates whenever the text element is edited.
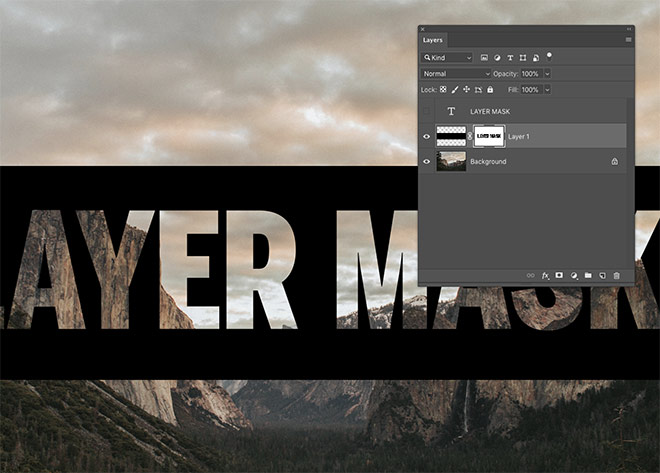
The technique I previously used to create this effect made use of a Layer Mask. This method lacks the ability to edit the text after it has been filled within the mask. It is also difficult to apply several knockout layers with the option of removing just one, without having to rebuild the entire effect.
Example Usage: Easily add texture effects
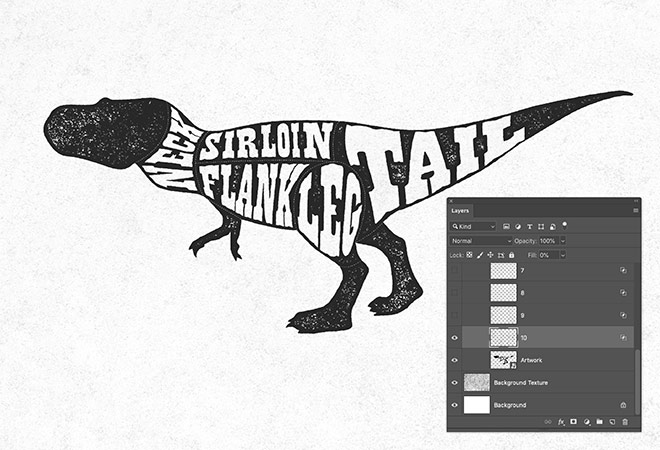
My favourite use of Knockout is to apply texturing effects to my artwork, without using a Layer Mask. This method allows you to easily overlay several texture layers to either pick and choose between them, or layer up multiple textures at once. You can see this in action within my free Ink Stamp Texturizer download.
The post The Knockout Method is my New Favourite Photoshop Technique appeared first on Spoon Graphics.
0 Comments